- Help center home
- Getting started
- Content model
- Managing content
- Working with entries
- Working with media
- Working with translations
- Managing users
- Roles
- Account settings
- Administration
- Content orchestration
- Compose
- Launch
- Workflows
- How to get help and support
- Guides
- Contentful certification
- Contentful glossary
- Manage cookie consent
- Apps
- Usage Limit
- Marketplace
Creating tags
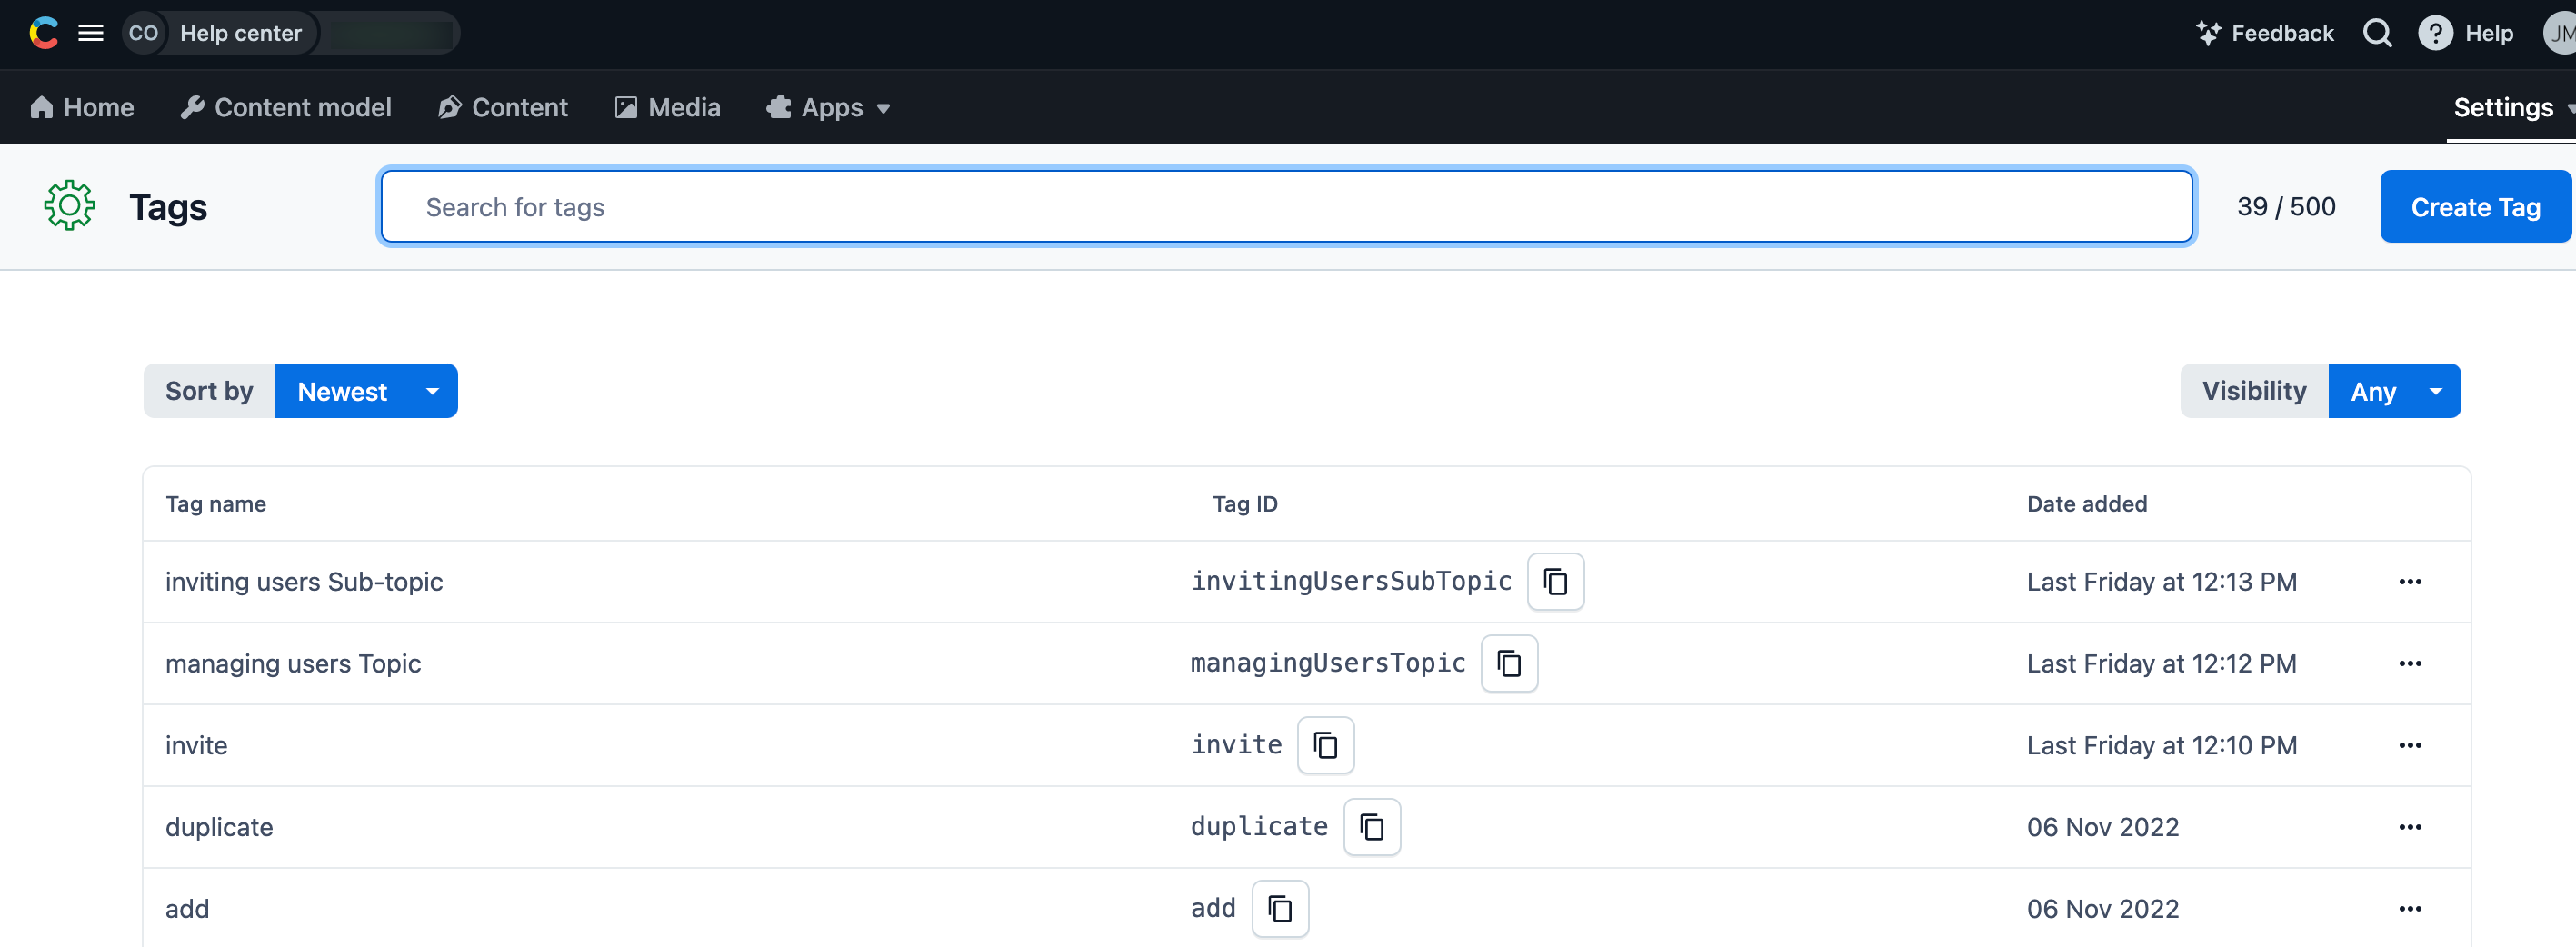
In the Tags page you can create new tags, as well as view, rename or delete the existing tags. Renaming and deleting tags instantly updates all entries and assets containing the tag.
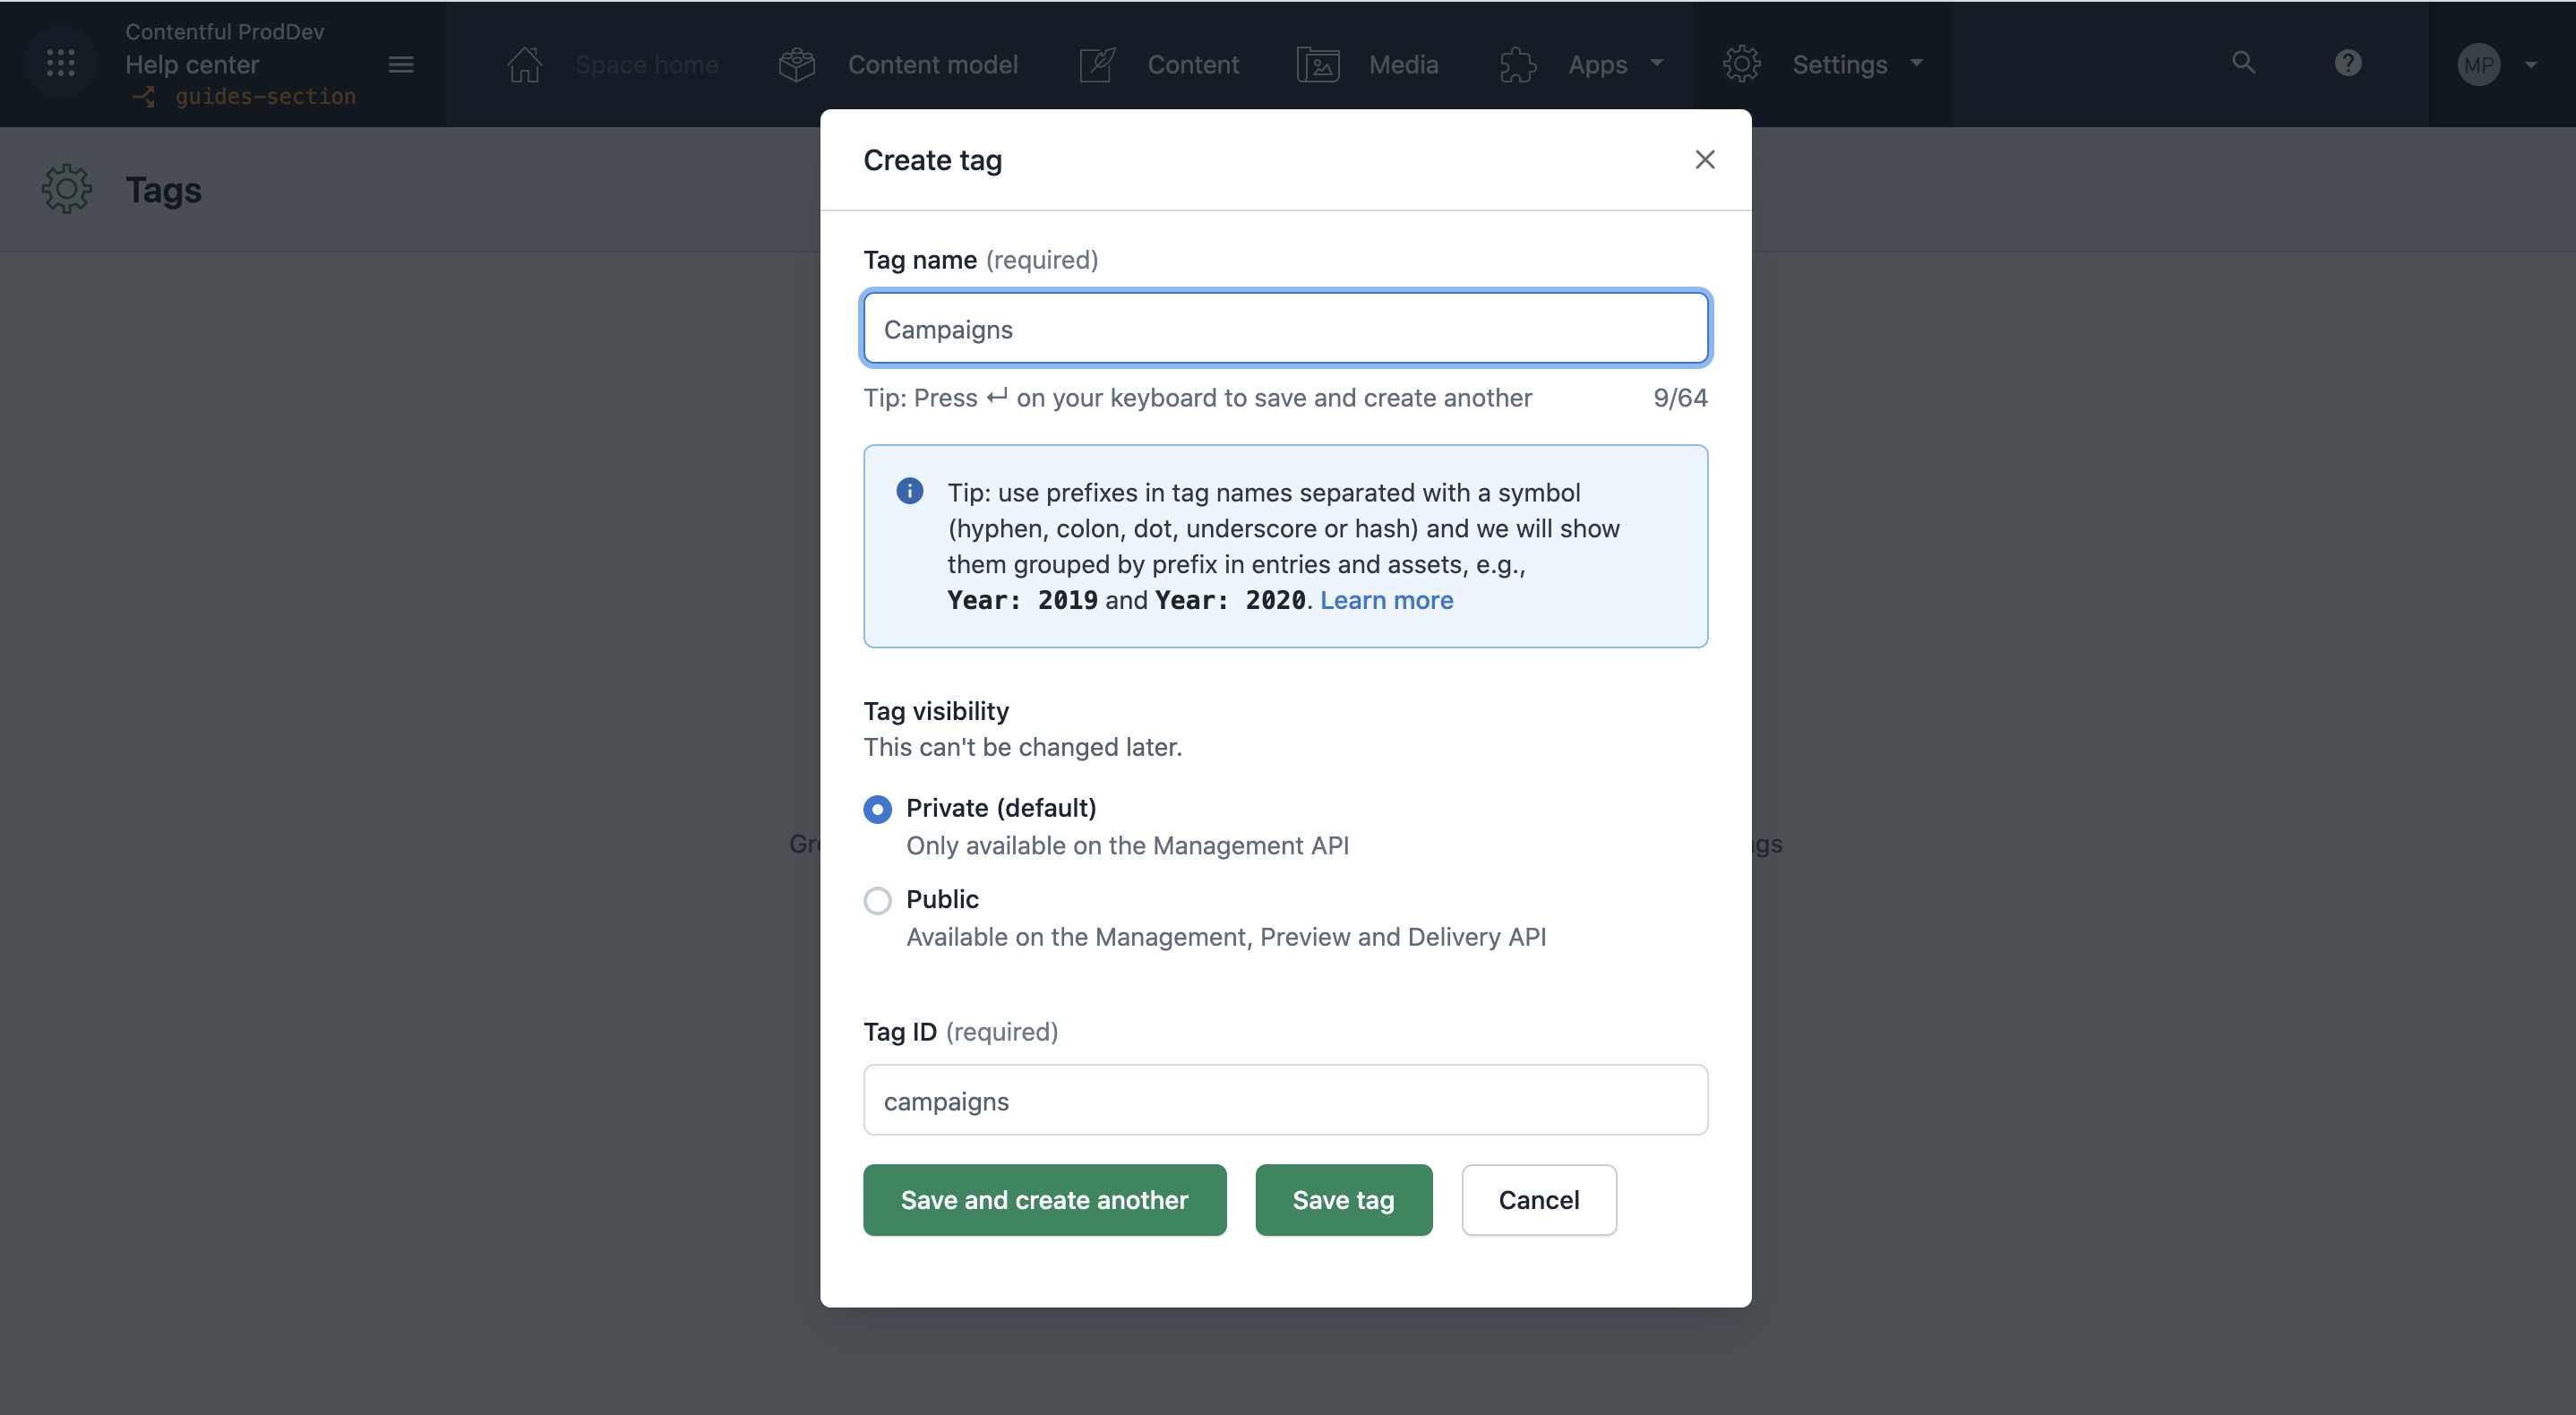
When creating a tag, you will enter a custom name and ID for it. An ID is filled in automatically as you enter a tag name, but you can change it according to your preferences. An ID can contain only letters, numbers, periods, hyphens and the underscore symbol.
Tags can be either public or private, and this type cannot change after the tag is created. By default, tags are private.
To create a tag:
In the Contentful web app, navigate to the Settings tab and select Tags. The Tags page is displayed.
Click Create Tag on the right. Create tag window is displayed.
Enter a custom name for your tag in the Tag name field.
Under the Tag visibility field, select a radio button to set your tag visibility to either private or public.
If necessary, change the automatically filled in value under the Tag ID field.
Click Save tag. Your tag is saved. Alternatively, if you wish to add multiple tags, click Save and create another.


Filtering by tag visibility
You can use the visibility filter in the top right of the Tags page to filter your list of tags according to public or private.

Assigning tags to entries and assets
Once a tag has been created, you can add it to entries and assets. The ability to add tags is defined by your space permissions (see our article about Content permissions for details).
NOTE: A tag that is assigned to an entry doesn't propagate to entries or assets nested in its reference fields.
To add a tag to an entry or asset:
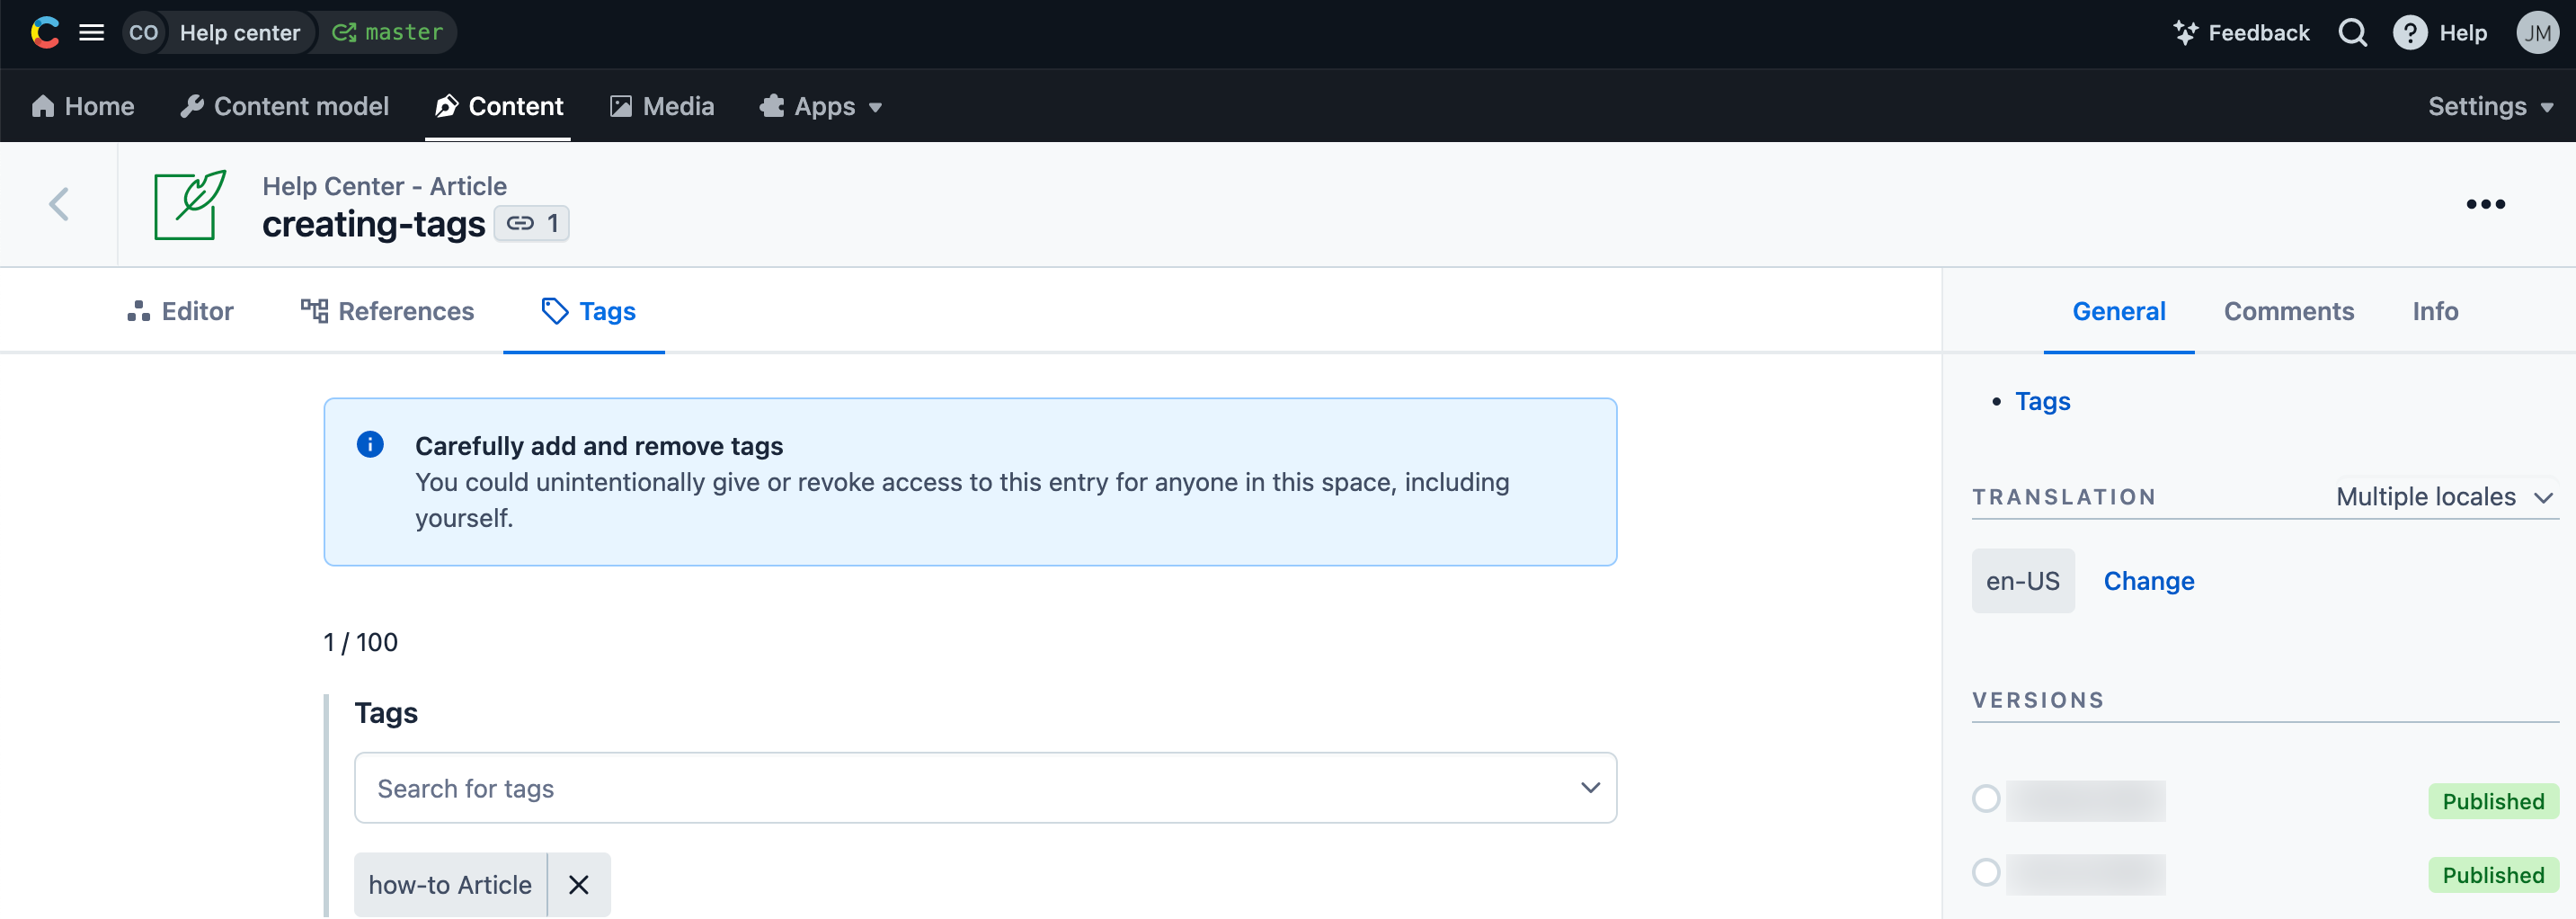
Navigate to your desired entry or asset editor page.
Go to the Tags tab.
Click on the search for tags dropdown and select the desired tag. You can assign one or multiple tags to your entry or asset.
You can remove a tag by clicking on the x to the right of the tag name.

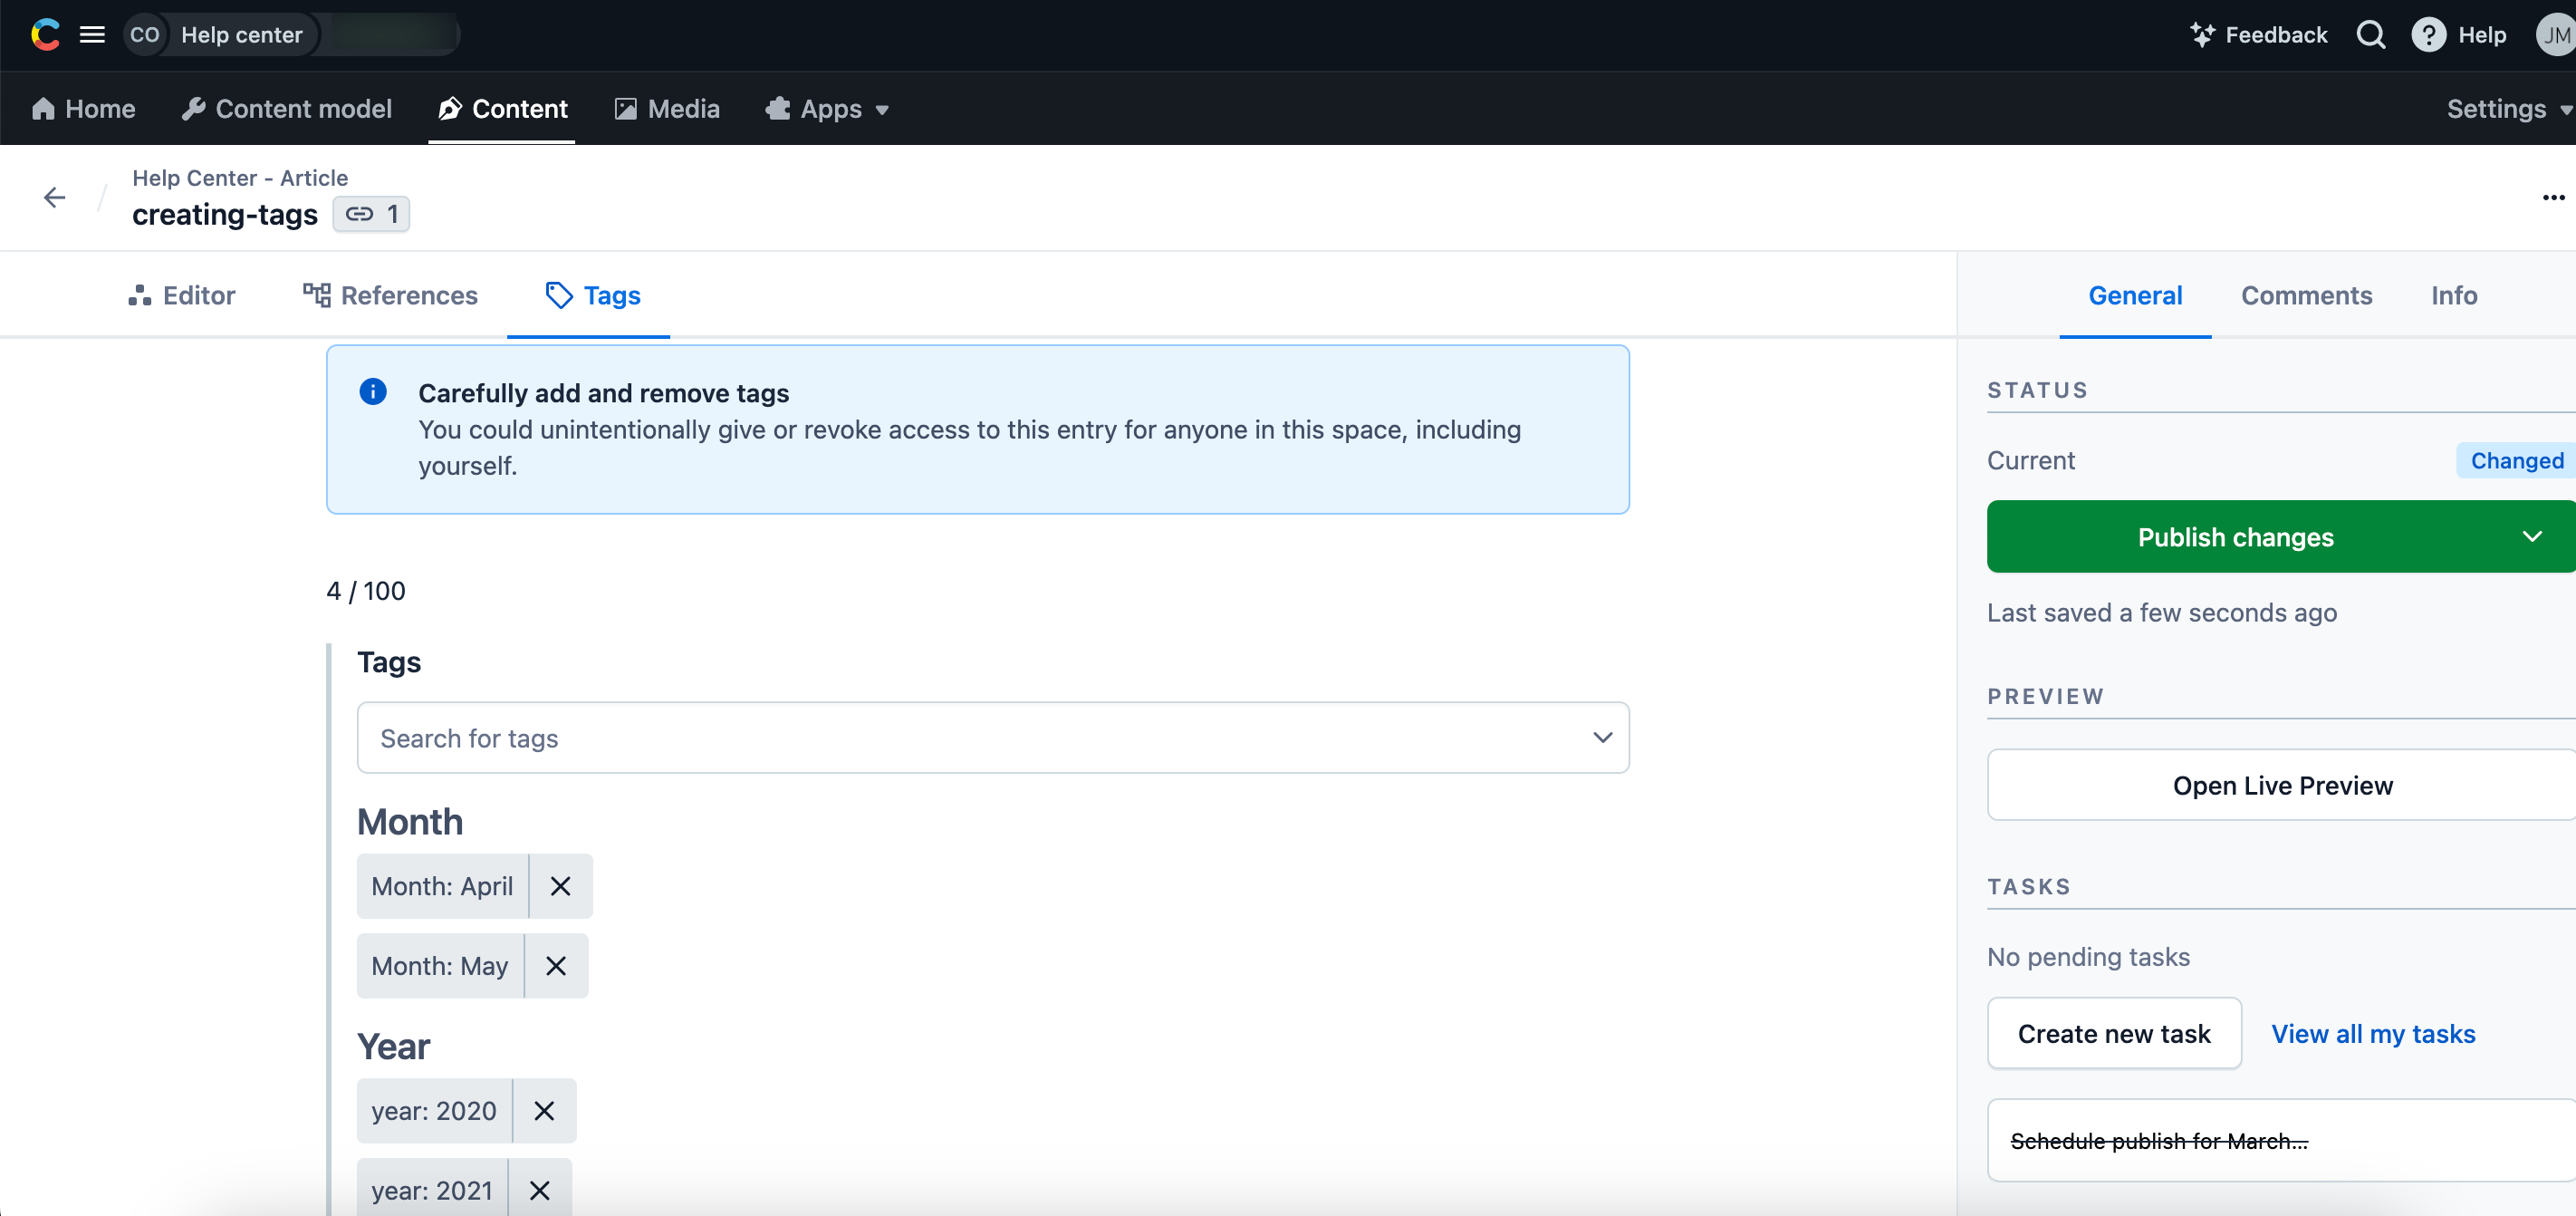
Grouping tags
Use prefixes in tag names separated with a symbol (hyphen, colon, dot, underscore or hash) to group tags by a prefix. After you assign such a tag to an entry or asset, it will be displayed under the relevant group in the editor page. For example, tags with names "Year: 2020" and "Year: 2021" will be displayed under the group "Year".
