- Help center home
- Getting started
- Content model
- Managing content
- Working with entries
- Working with media
- Working with translations
- Managing users
- Roles
- Account settings
- Administration
- Content orchestration
- Compose
- Launch
- Workflows
- How to get help and support
- Guides
- Contentful certification
- Contentful glossary
- Manage cookie consent
- Apps
- Usage Limit
- Marketplace
Salesforce Commerce Cloud App Guide
On this page
- Overview
- Requirements
- Usage
- Step 1: Configuring a Salesforce Commerce Cloud API Client
- Step 2: Retrieving configuration values from your Salesforce Commerce Cloud instance
- Step 3: Installing the Salesforce Commerce Cloud Connector
- Step 4: Configure your Content Types
- Step 5: Selecting Products and Categories
The Salesforce Commerce Cloud Connector for Contentful allows you to use Salesforce B2C (Demandware) products and categories in your entries in Contentful.
Overview
Once installed, you can change the appearance for a Short Text field to load and store Salesforce Commerce Cloud product or category IDs. Your content teams can open a picker, view and search for products and categories, and embed them into an entry.
Requirements
To use this app, you will need:
Administrator access to Salesforce Commerce Cloud B2C (Demandware)
A content type with a short text field
Usage
Step 1: Configuring a Salesforce Commerce Cloud API Client
You will need to create a Salesforce Commerce Cloud API Client before installing the app. You can follow Authorization for Admin APIs to create this client.
Please copy and save the Password you select for the API Client, also known as the Client Secret.
The API Client will require you to select a list of scopes. For this app to work, your API client will need to include the following scopes at a minimum, under Allowed Scopes.
sfcc.products
sfcc.catalogs
Copy the API Client ID value and save it for later. You can now save the configuration and go to your Contentful space.
Step 2: Retrieving configuration values from your Salesforce Commerce Cloud instance
Next, you will need several values from your Salesforce Commerce Cloud instance:
Organization ID - the unique ID for your specific Salesforce Commerce Cloud instance
Short code - a unique value for your organization that helps route data correctly
Site ID - the unique name of your Salesforce Commerce Cloud site
You can follow this guide to find each value. Once found, copy those values and save them for the next step.
Step 3: Installing the Salesforce Commerce Cloud Connector
Navigate to the Contentful Marketplace and install the Salesforce Commerce Cloud app. Upon installation, you will be asked to provide the API Client ID, Client Secret, Organization ID, Short Code and Site ID values you just generated. Provide them in the appropriate boxes of the configuration screen.
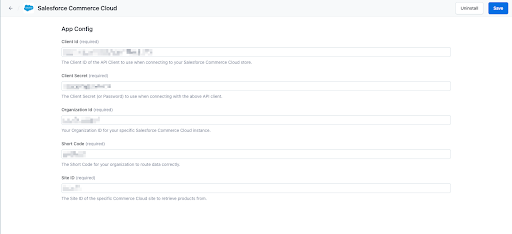
Once you've entered all of the configuration values, press Install in the top right to complete the installation of the app.
Step 4: Configure your Content Types
Once you've installed the app, you'll need to set up the content types that will be used to store the product and category information retrieved from Salesforce Commerce Cloud. Within a new or existing content type, create a new field which will be used to store the information retrieved from Salesforce Commerce Cloud by selecting the Add Field button in the right sidebar of the Content Type configuration screen, then selecting Text from the "Add new field" dialog that appears.
When creating this field, we recommend naming it something memorable like ‘Salesforce Commerce Cloud Product’. Make sure you select the "Short text, exact search" option under type, which should be selected by default. If you would like the field to store multiple products or categories - such as for use in a product carousel - select the List option. Select the "Add and Configure" button in the bottom right of the dialog to continue.
Next, navigate to the Appearance tab of the field editor dialog and select the Salesforce Commerce Cloud option. Once selected, choose either "Product" or "Category" from the Field Type dropdown. Finally, press Confirm to save your new field.
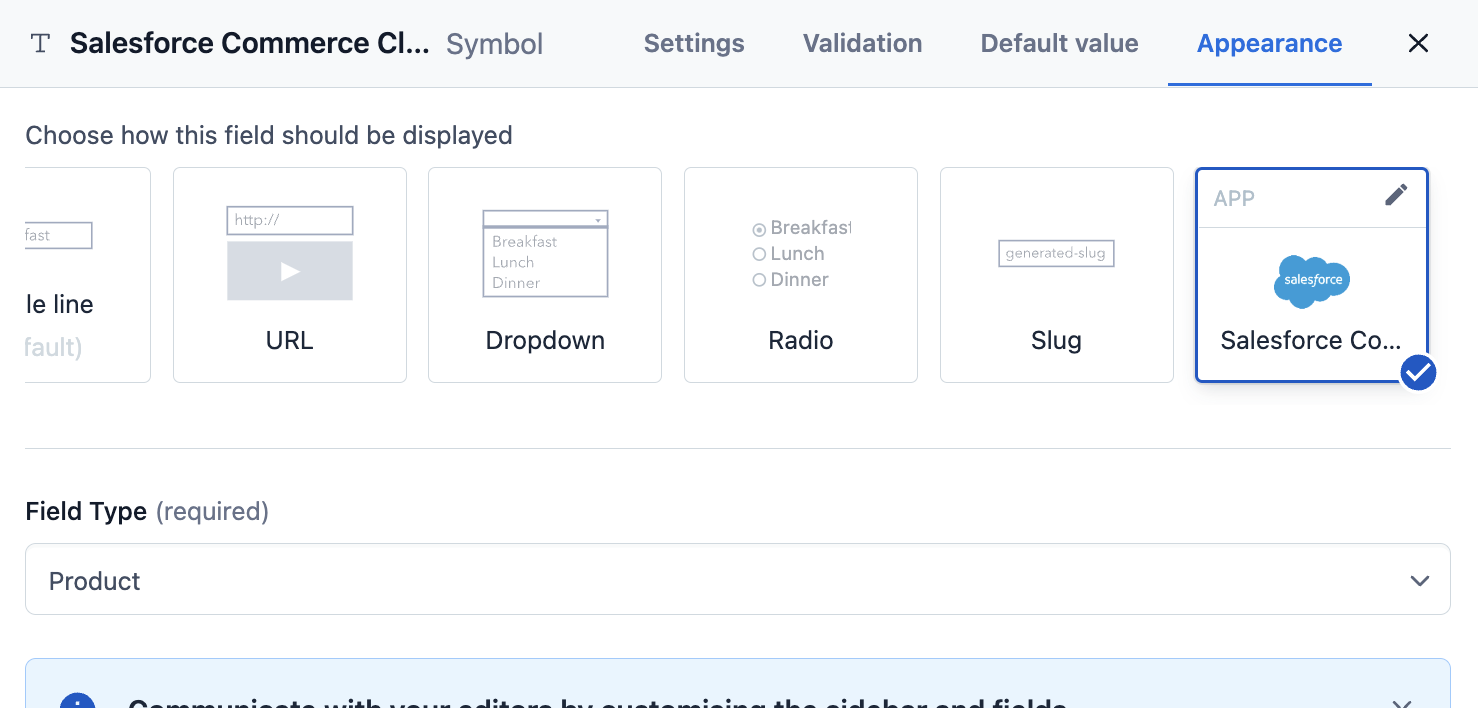
The last thing to do before you start using the app is to save the updated content type. Select "Save" in the top right corner and you can now start making use of the Salesforce Commerce Cloud app to select products and categories directly within your content entries.
Step 5: Selecting Products and Categories
Now that you have configured a content type, create or update an entry using that content type to begin selecting products and categories. When viewing the editor of the corresponding entry, instead of seeing the default Short Text field editor for your new field you will now see the Salesforce Commerce Cloud app interface:
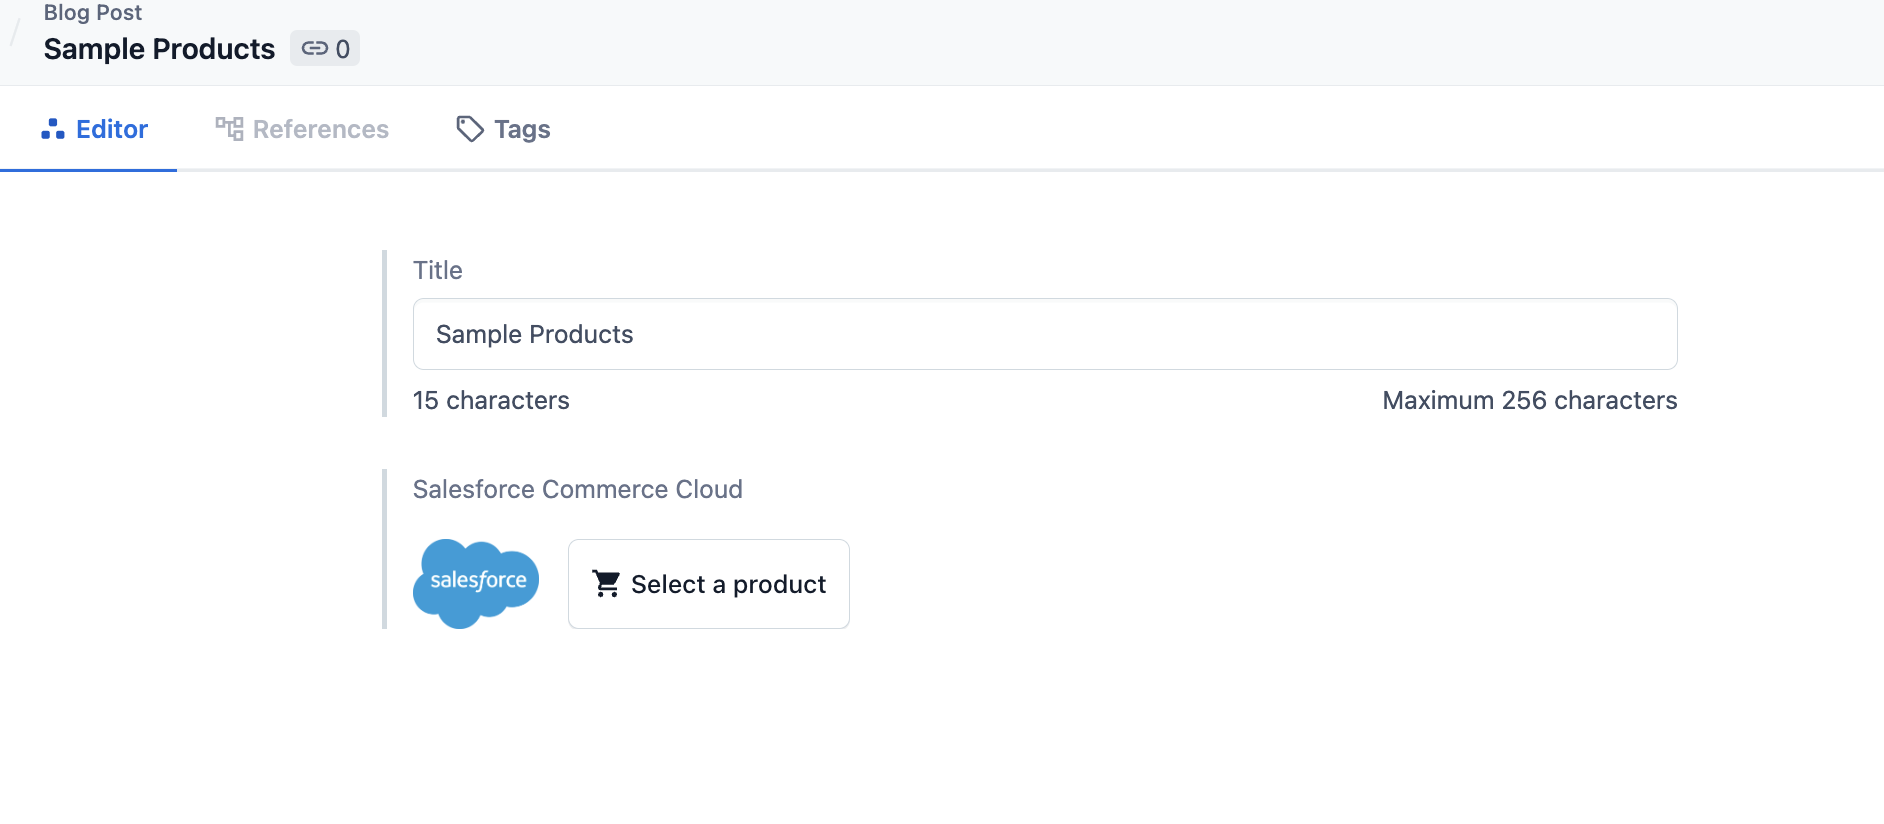
Click the “Select a product” or "Select a category" button to open a dialog window for selecting the appropriate item. By default, all of your Products or Categories will load alphabetically, and a search query can also be included to narrow down the list. Depending on whether or not your Short Text field is configured as a list, you'll either have the option to select only a single item or multiple items by clicking on them in the dialog.
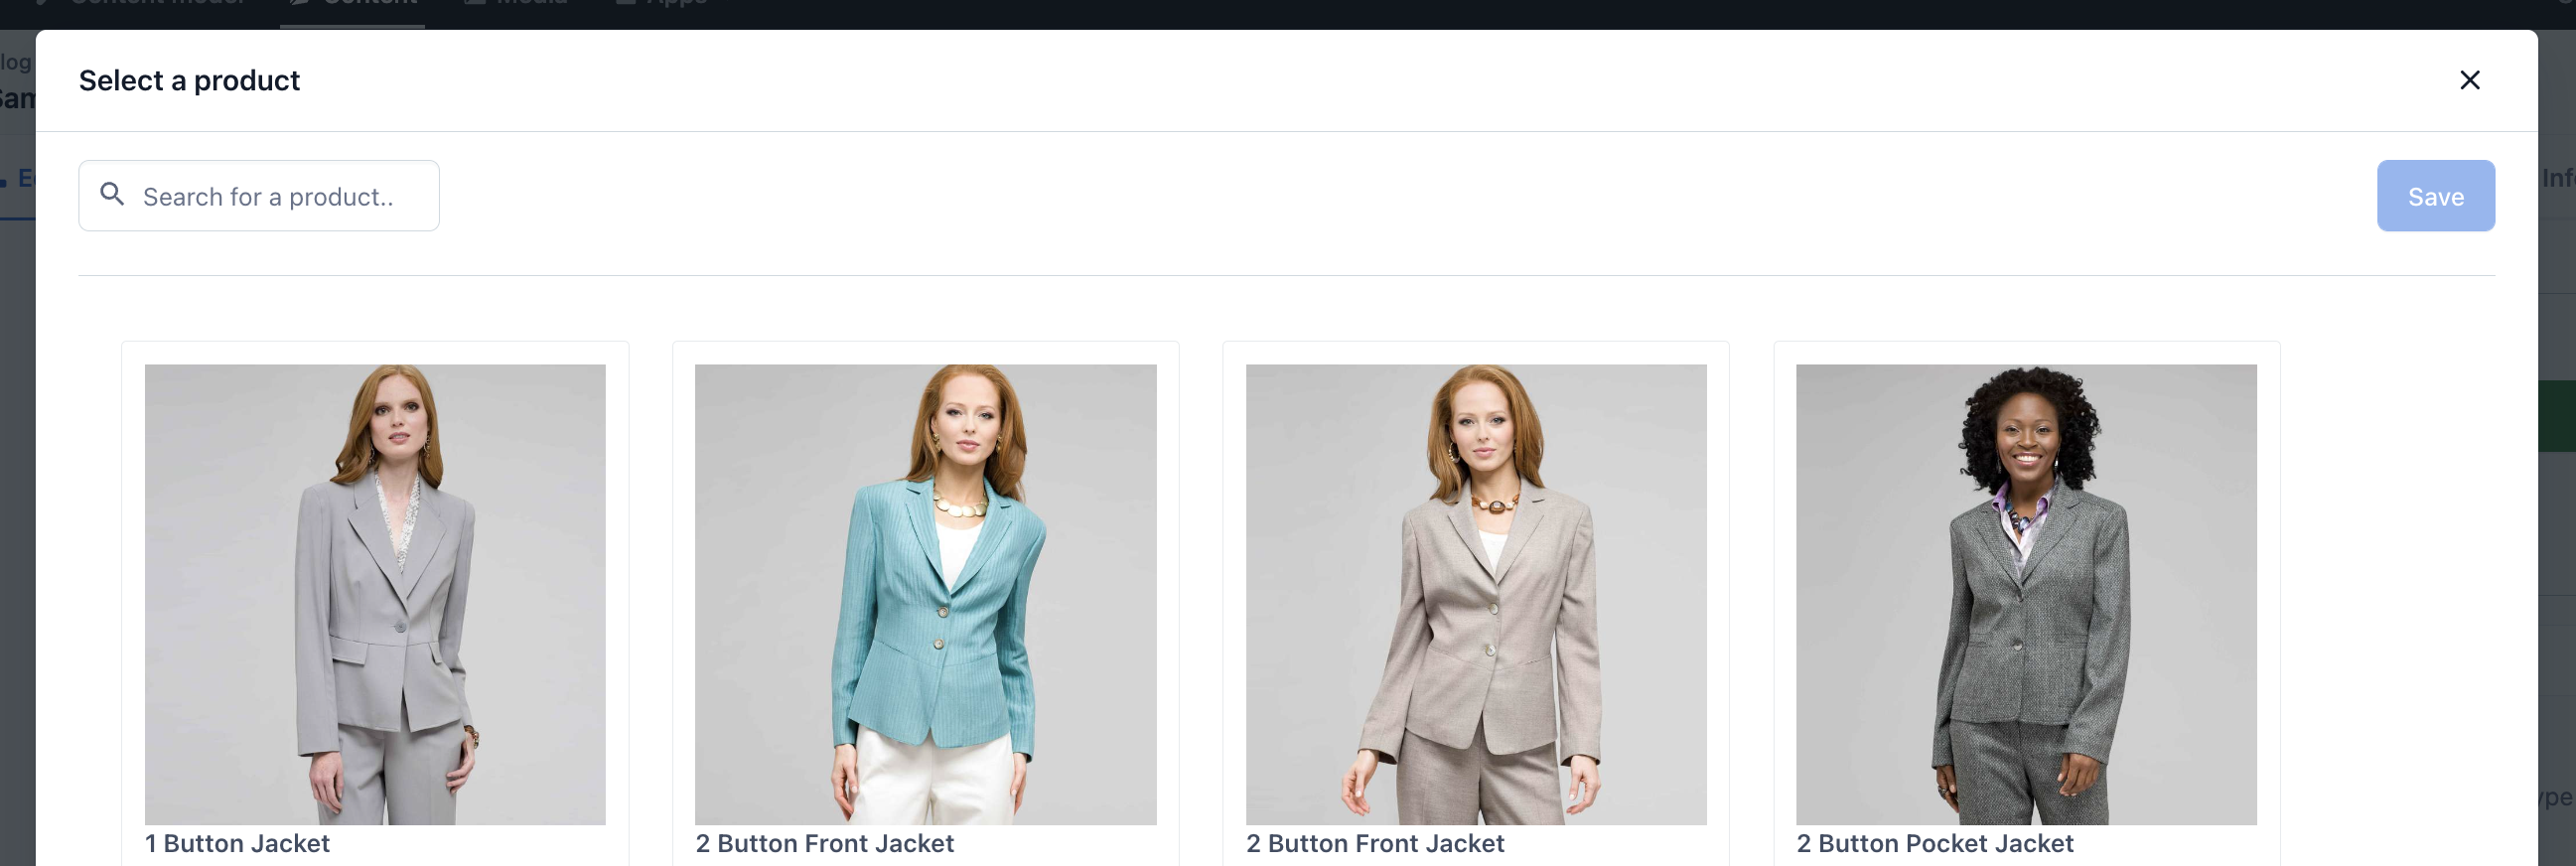
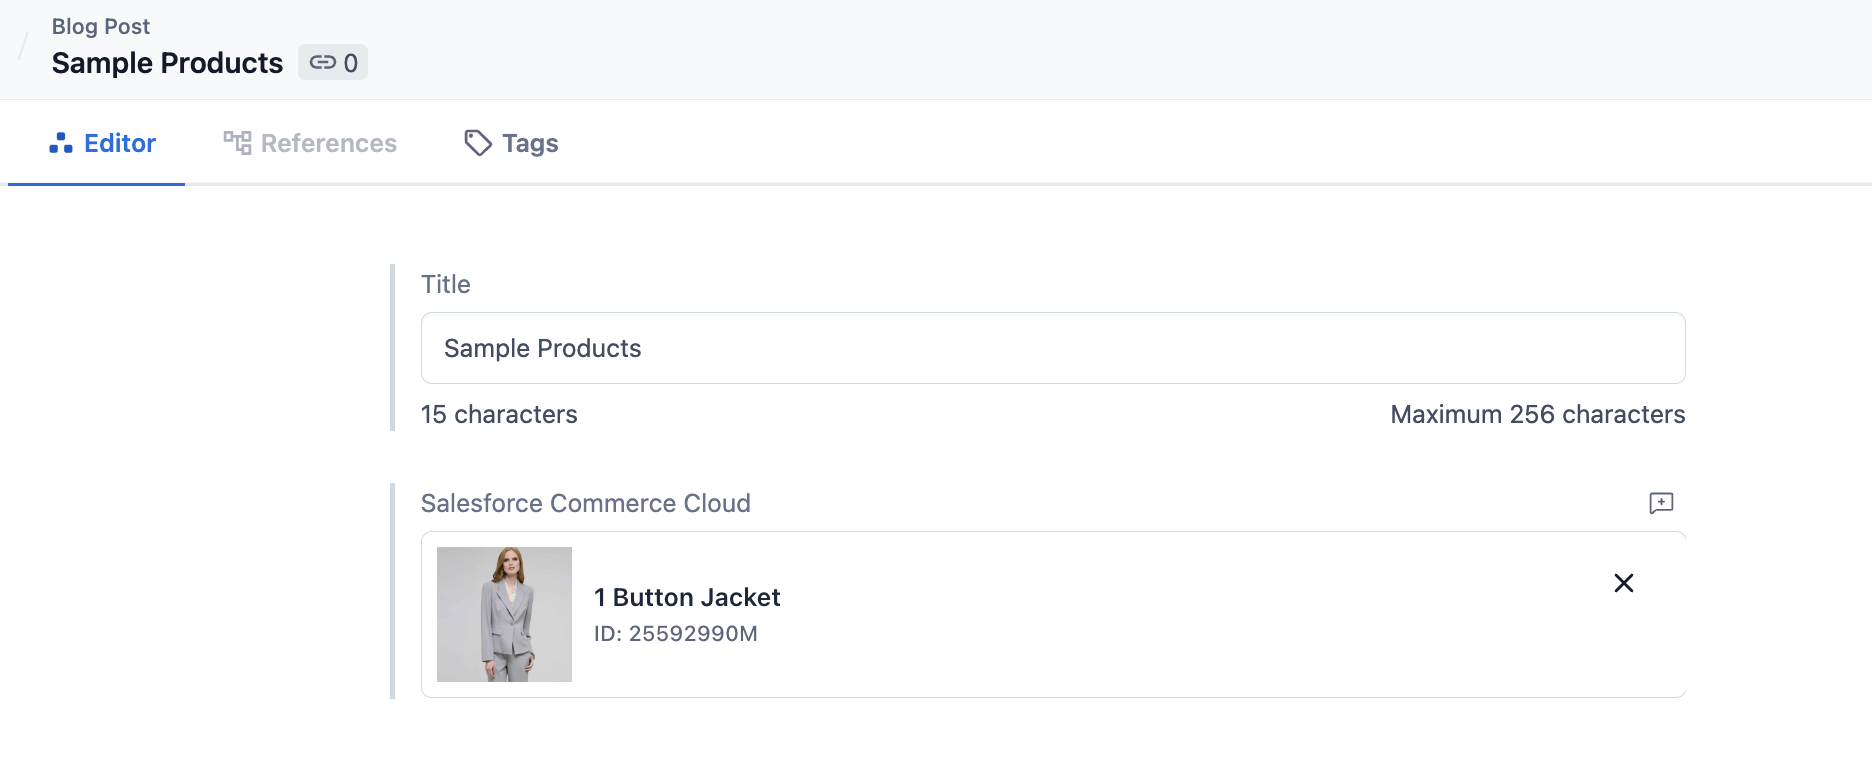
After you select your item(s), press Save to embed the data into your entry. You will see a simple thumbnail for the selected product or category in the field, as well as the product name and ID. Additionally, if you selected multiple items, you can now rearrange the order of those items by dragging and dropping them into whatever order you like.
