- Help center home
- Getting started
- Content model
- Managing content
- Working with entries
- Working with media
- Working with translations
- Managing users
- Roles
- Account settings
- Administration
- Content orchestration
- Compose
- Launch
- Workflows
- How to get help and support
- Guides
- Contentful certification
- Contentful glossary
- Manage cookie consent
- Apps
- Usage Limit
- Marketplace
Tables in Rich Text fields
On this page
Add a table to Rich Text field
You can create a table inside your Rich Text field using the editor toolbar.
Inside the table, you can add text, break it down into paragraphs, highlight it (bold, italics, underline, code), and add hyperlinks. You can also reference other entries inside your table.
NOTE: For tables created in Rich Text fields to be displayed on your website, your developers team needs to make changes to your front-end application. For websites, they can use the latest version of the Contentful rich text renderer, or a client library that supports tables.
Create a table
To create a table inside your entry:
Access your entry editor page.
In the editor toolbar of your Rich Text field, click on the Table button. A default table of two rows and two columns with header enabled is added to your entry.
Optional: Modify your table using one or multiple options from the cell actions menu.

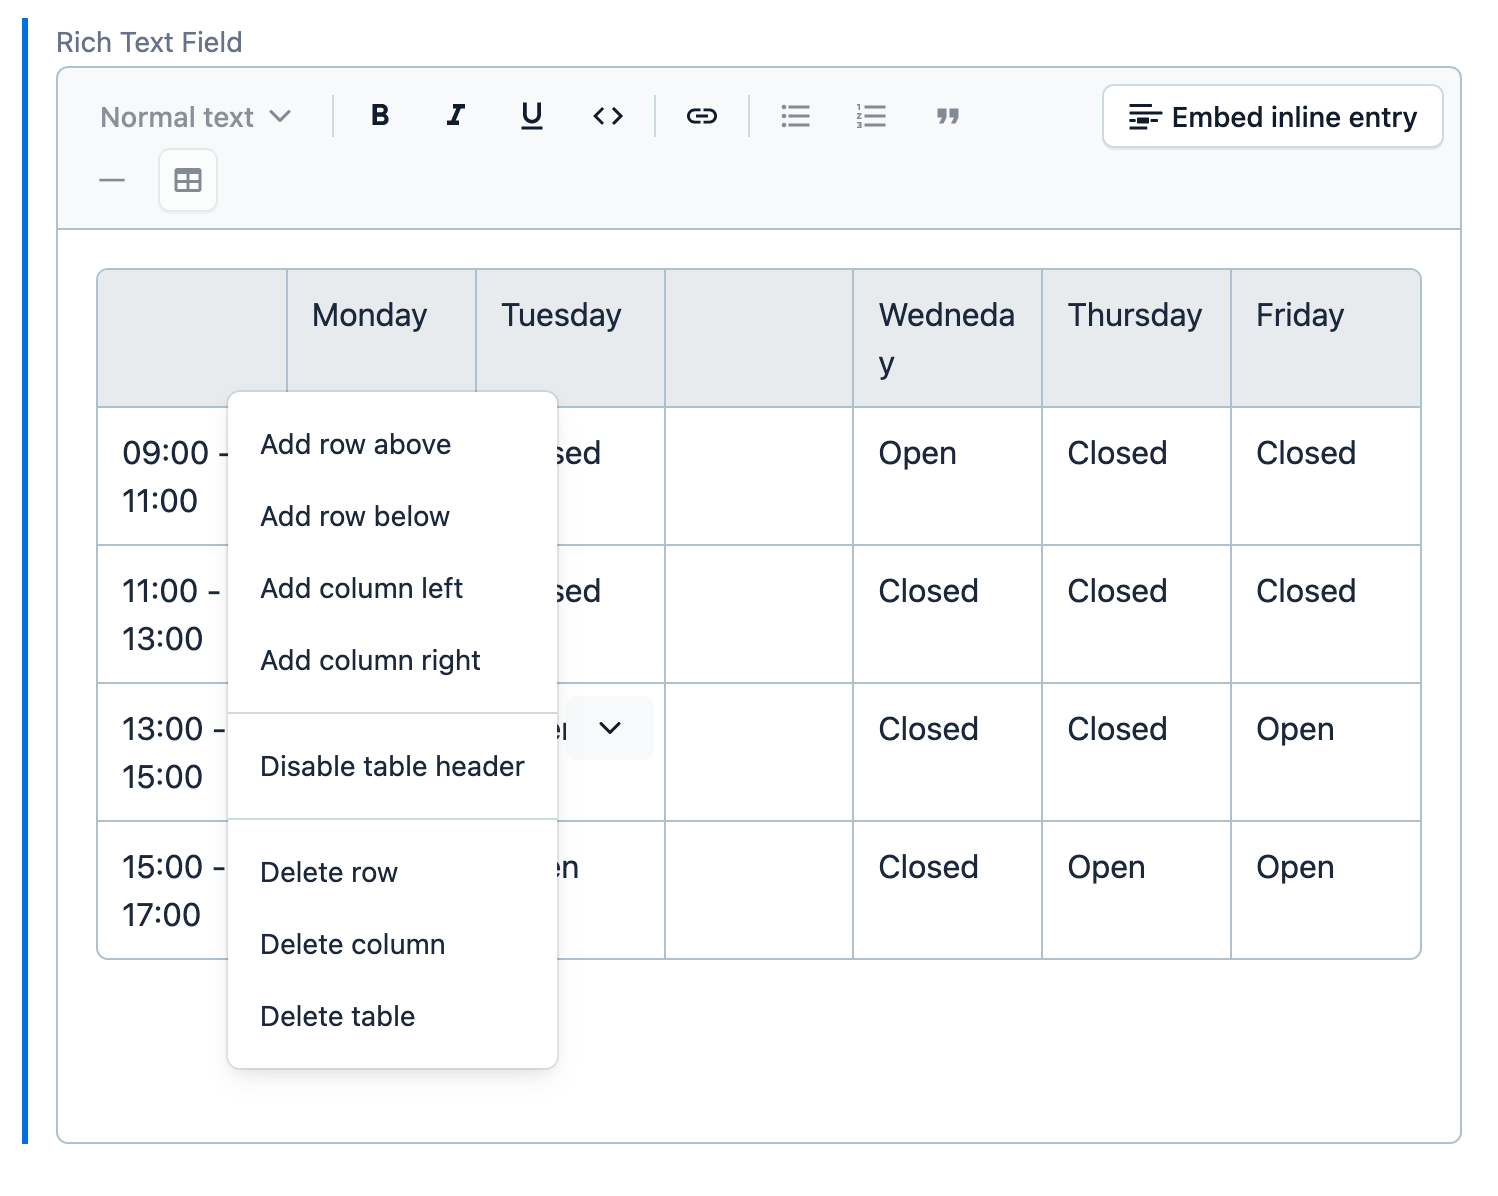
Cell actions menu
To open the cell actions menu, click an arrow button inside a cell. The cell actions menu allows you to do the following:
Add row or column - Select the desired option to add a row or column next to the row or column your cursor is placed in. NOTE: You cannot add a row above the table header.
Enable/ Disable table header - Select this option to activate or deactivate the header row in your table.
Delete row or column - Select this option to remove a row or column the cursor is placed in.
Delete table - Select this option to delete your table and all its content.

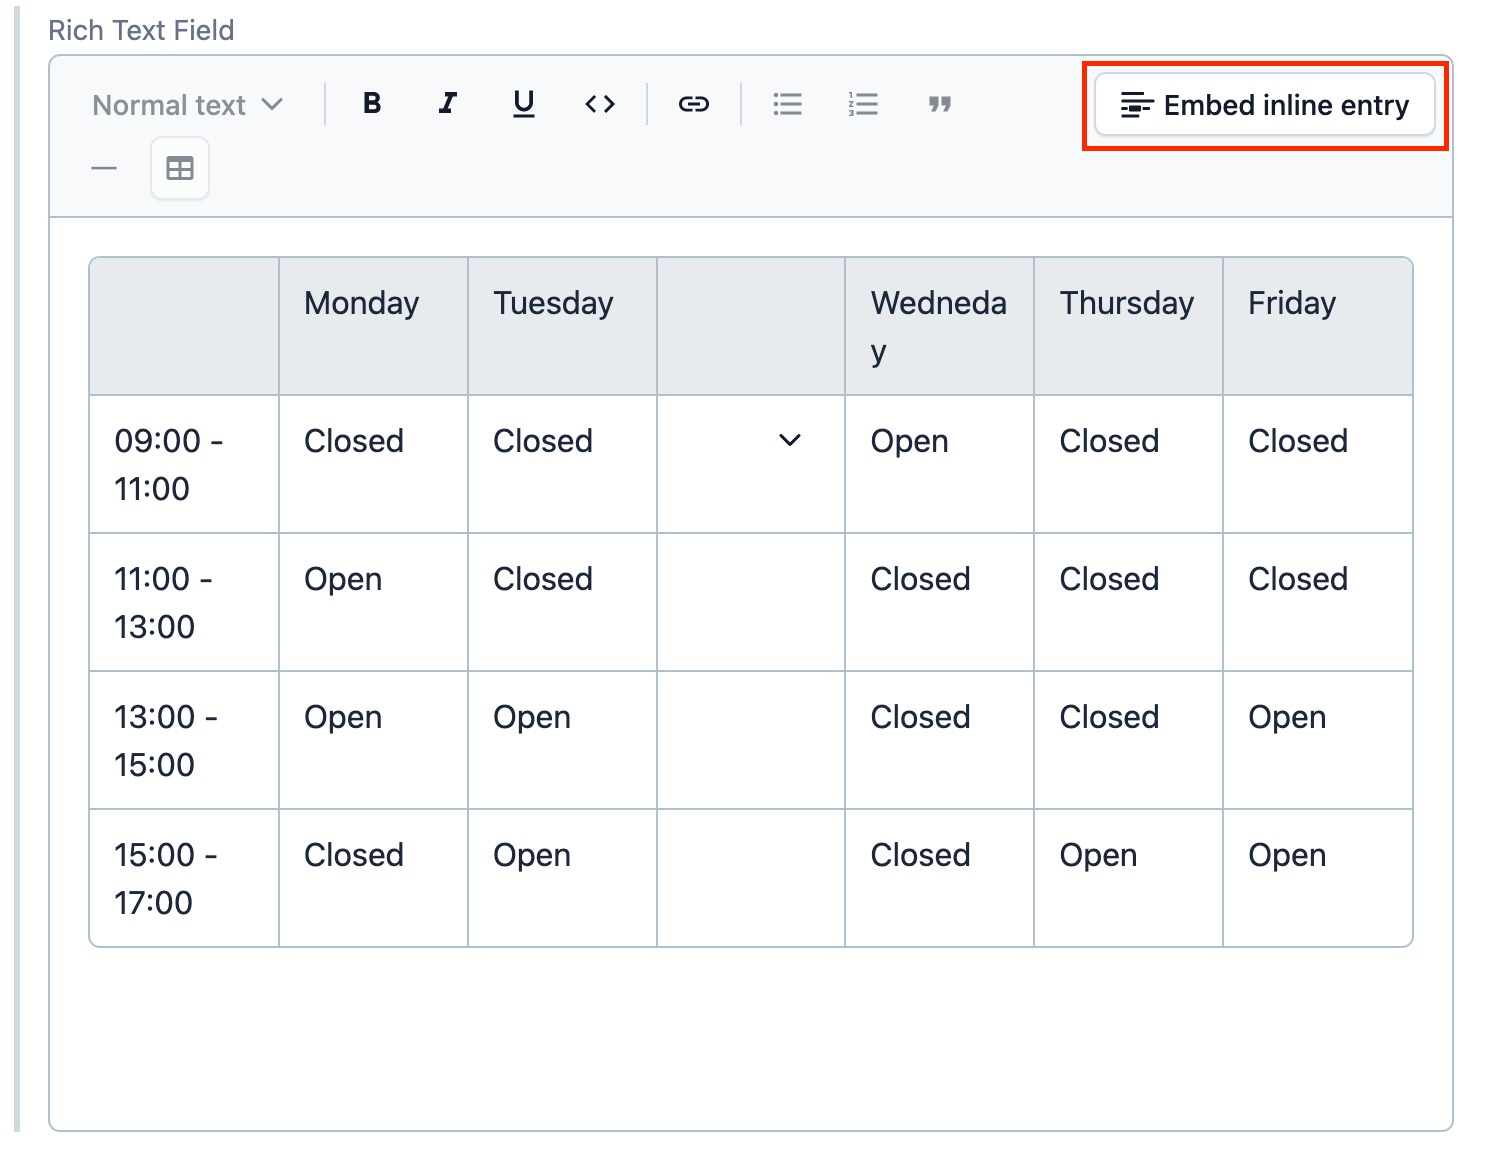
Embed inline entry
To embed an entry to your table:
Place the cursor inside the required cell.
Click Embed inline entry in the editor toolbar. The Add existing entry window is displayed.
Either select an existing entry from the list or click Create new entry to create a new one. The entry is embedded in your table. NOTE: Embedded entries in Draft state will be highlighted in yellow. The ones in Published state are highlighted in green.
Optional: To remove an embedded entry from the table, click on the entry actions menu and select Remove.

Copy tables from other sources
You can copy a table from an external source like Google Docs, MS Word or your website, and paste it into the Rich Text field in the entry editor. Highlighting, paragraphs and table headers formatting is preserved as in the original source. Bulleted or numbered lists are pasted as plain text.
Enable tables in Rich Text field
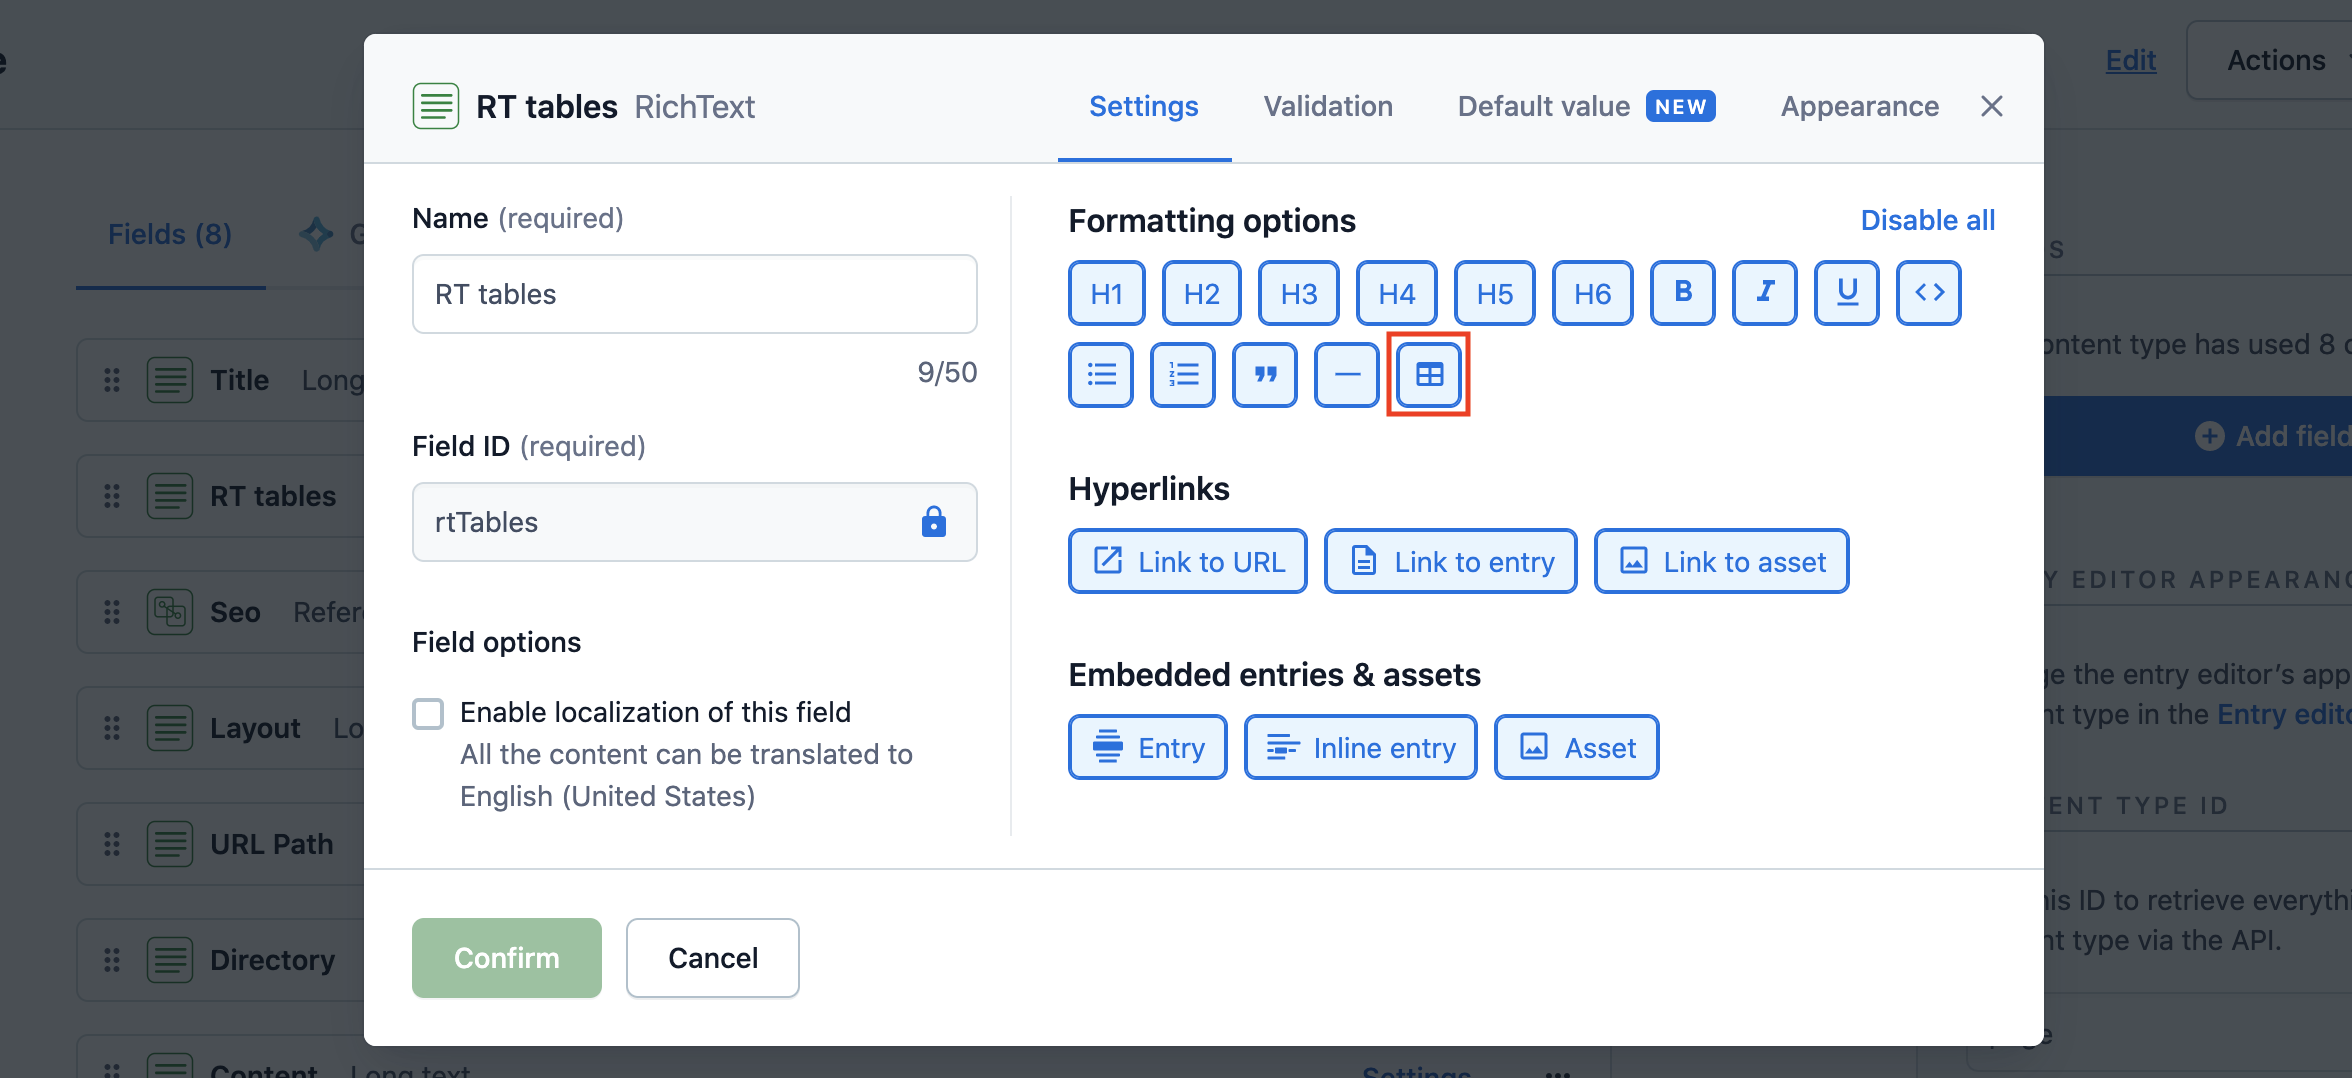
You can enable or disable the Table option for your Rich Text fields at content type level.
To activate the Table option:
Under the Content model tab, go to the required content type and click on it to open the content type editor.
Navigate to the required Rich Text field and click on Settings.
Under the "Formatting options" area, click on the Table icon to enable the option in the Rich Text field editor toolbar.
Click Confirm to apply the changes to the field.
Click Save.
