- Help center home
- Getting started
- Content model
- Managing content
- Working with entries
- Working with media
- Working with translations
- Managing users
- Roles
- Account settings
- Administration
- Content orchestration
- Compose
- Launch
- Workflows
- How to get help and support
- Guides
- Contentful certification
- Contentful glossary
- Manage cookie consent
- Apps
- Usage Limit
- Marketplace
Workflow steps: Search, filter and save views
Editorial users can customize their content table by searching, filtering and saving views based on the workflow step status of their content.
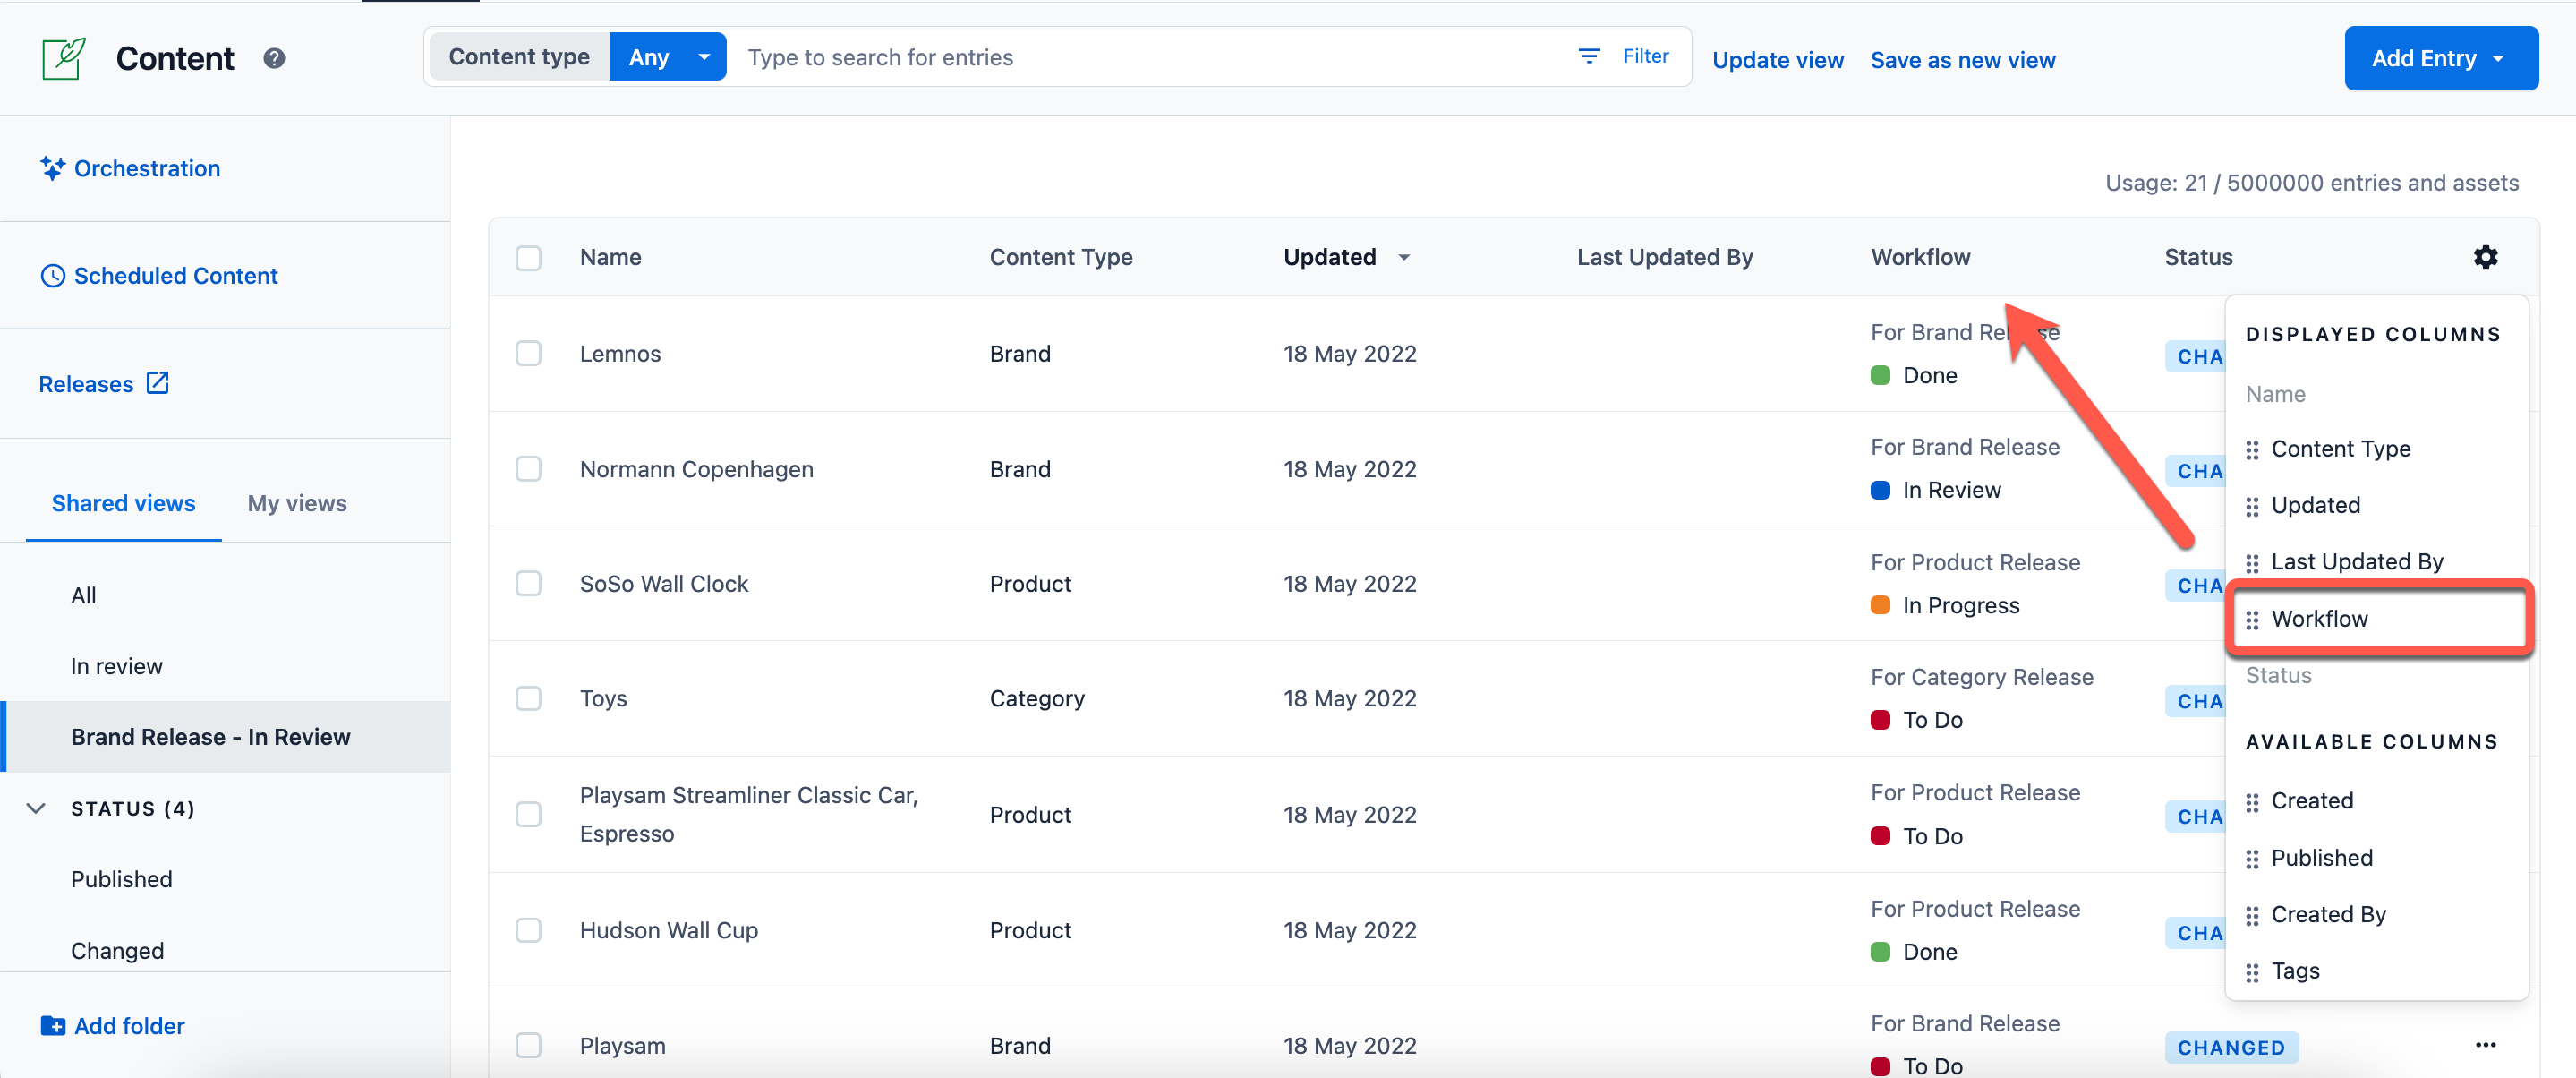
Adding a workflow column to the content table allows you to see an overview of the different states of content development.
To add a Workflow steps column in the content table:
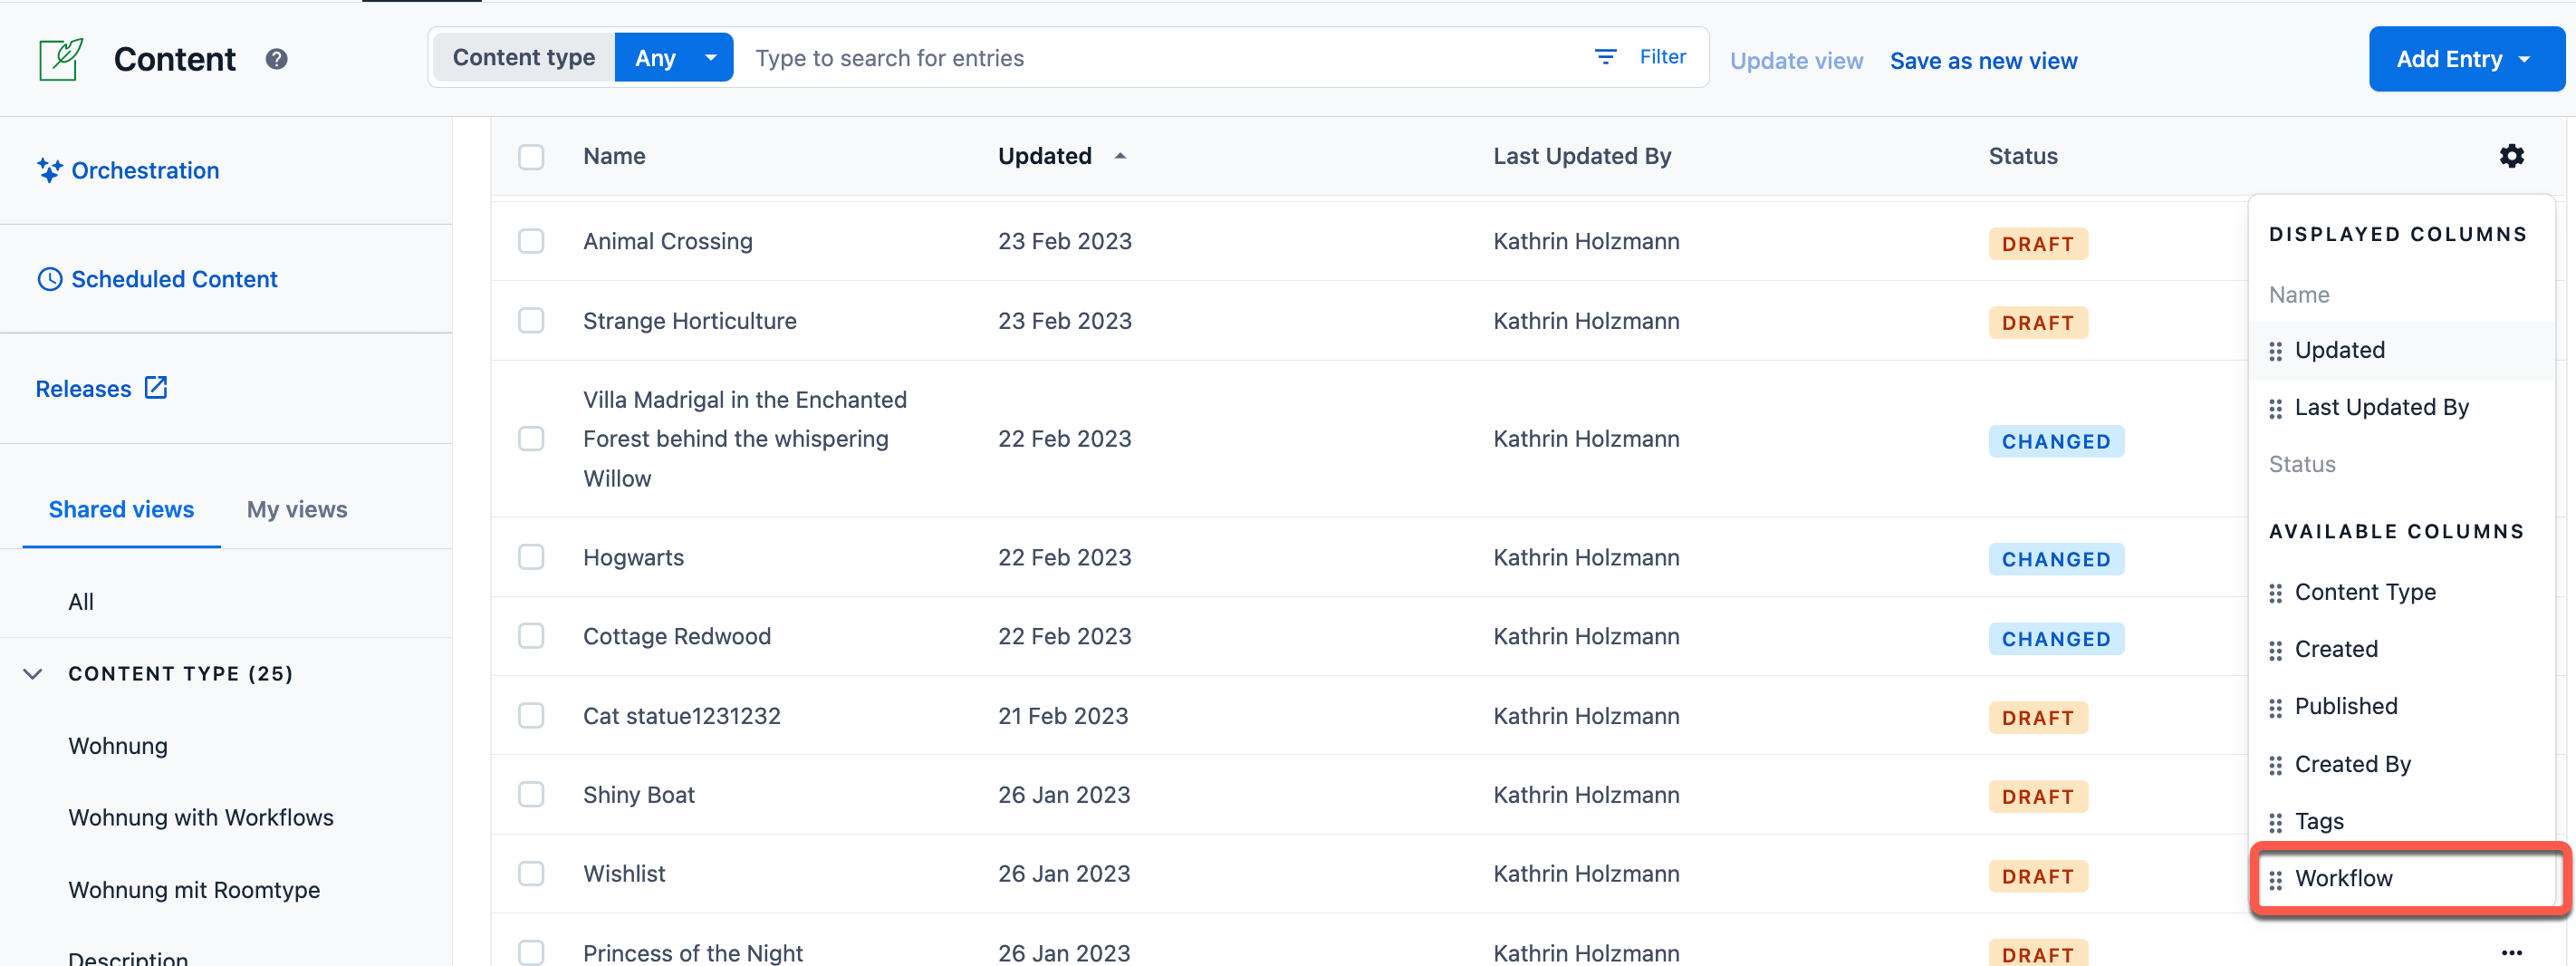
Under the “Content” tab, navigate to the content table. On the right side of the table, select the wheel icon for column settings.
In the “Available columns” section in the drop-down, select “Workflows” and drag it to the “Display columns” section.
NOTE: The hierarchical order of the “Display columns” section will indicate the placement of the workflows column in the content table.
The Workflow column will now appear in the content table.
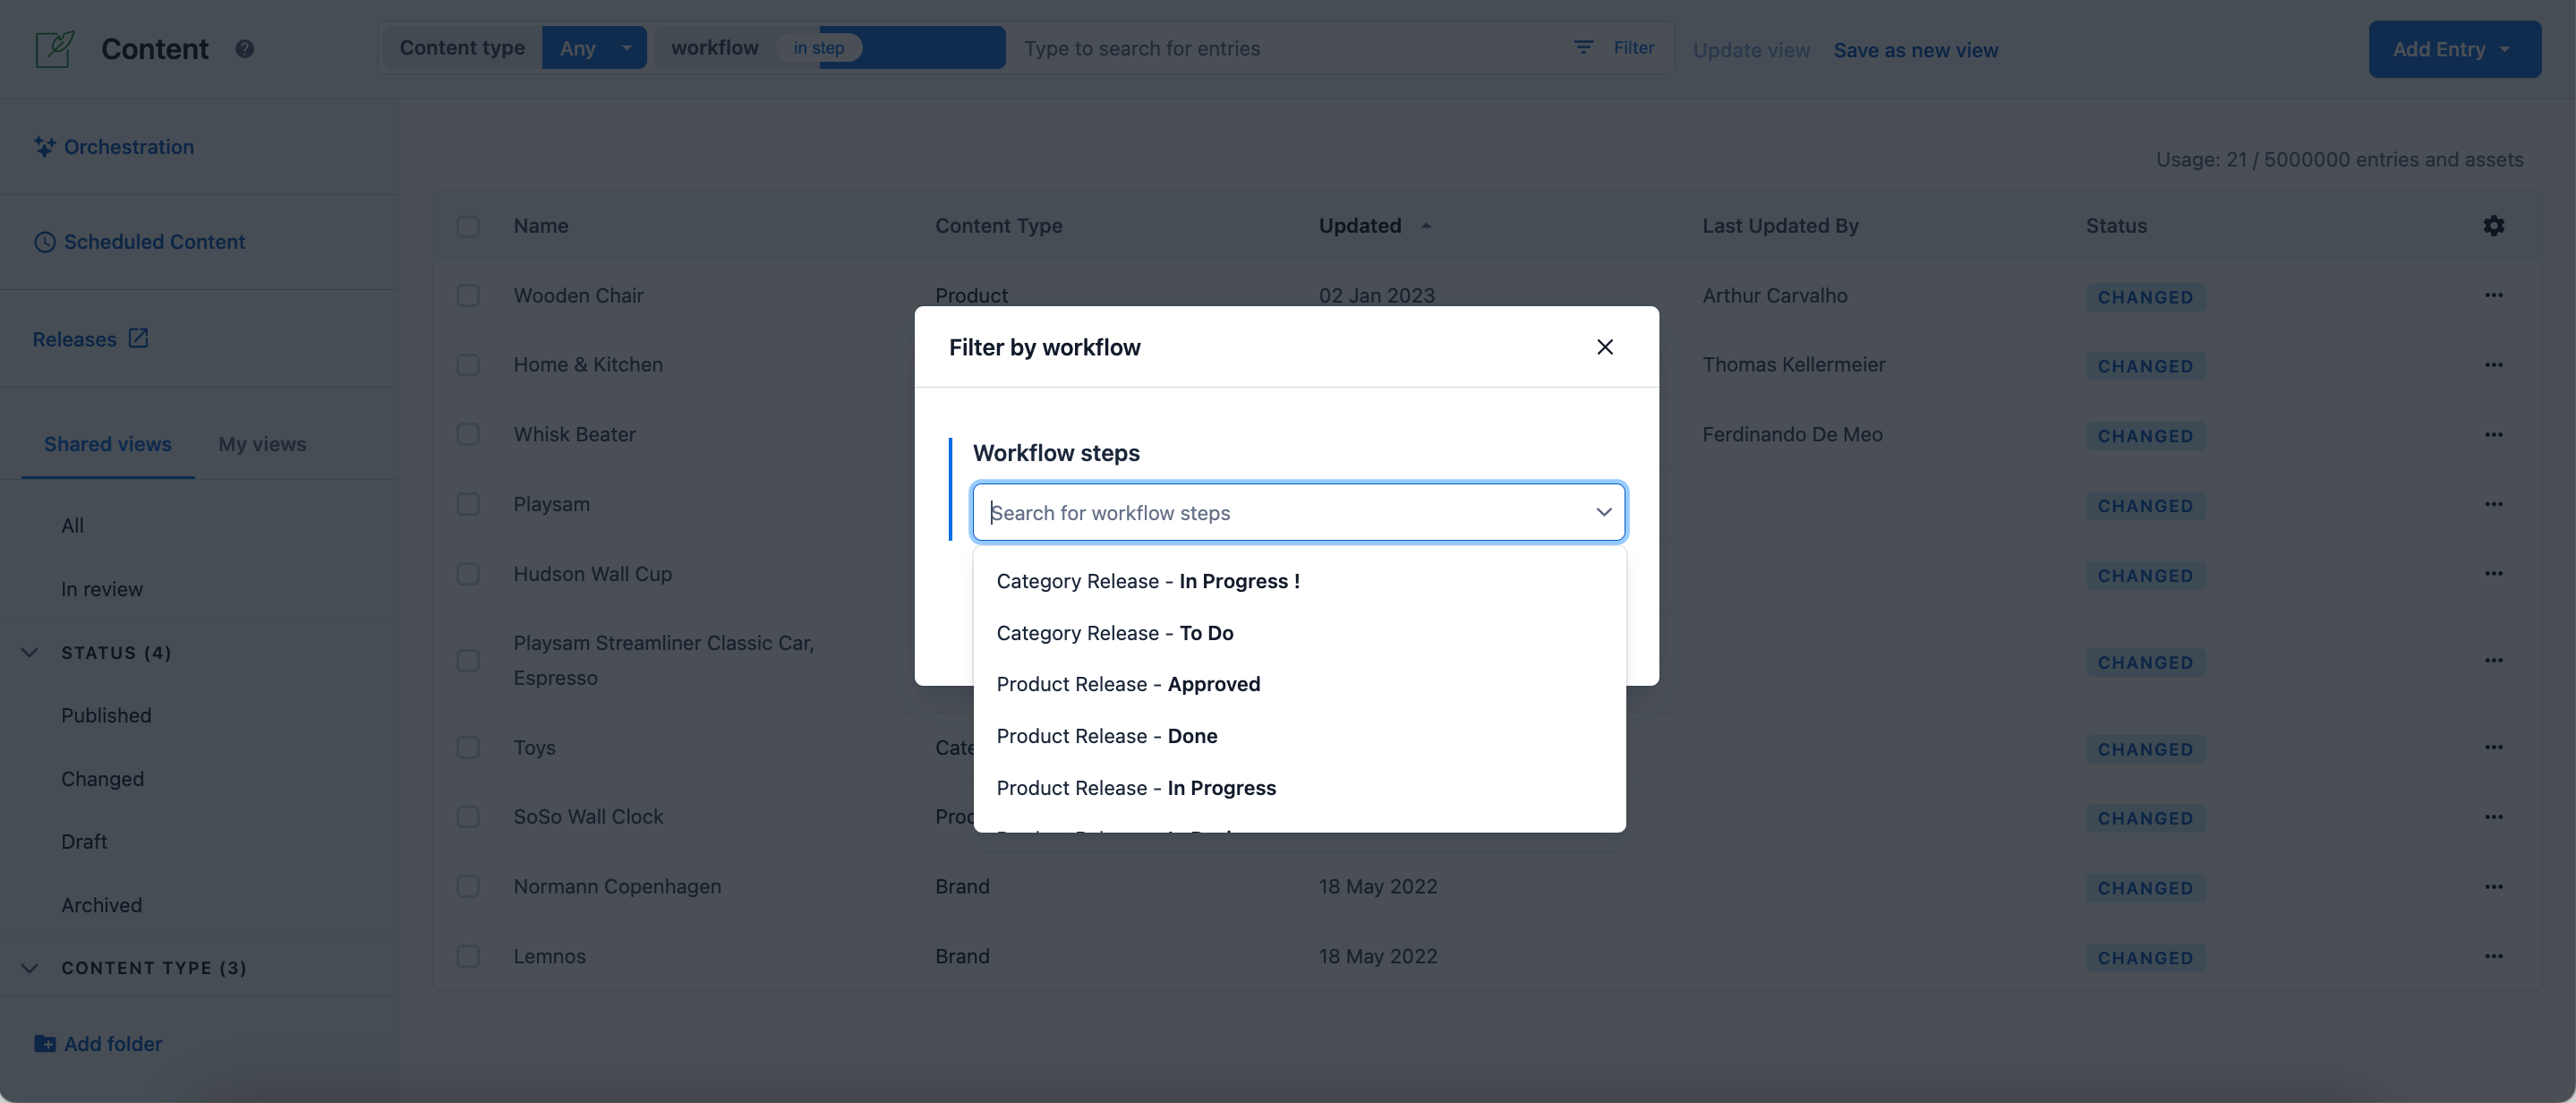
To search and filter the status of Workflow steps in the content table:
In the “Content” tab, navigate to the right of the search bar. Select the filter option to display the drop-down list.
Scroll down through the list of field types, select “Workflow.”

To filter the results by a specific Workflow step status, click on the blue box inside the search bar filter. In the “Filter by Workflow” modal, select the workflow status you want to view, click Apply.
To save a Workflow step status as a new view:
With the Workflow step filter applied to your search bar, select a workflow status from your “Filter by Workflow” pop-up.
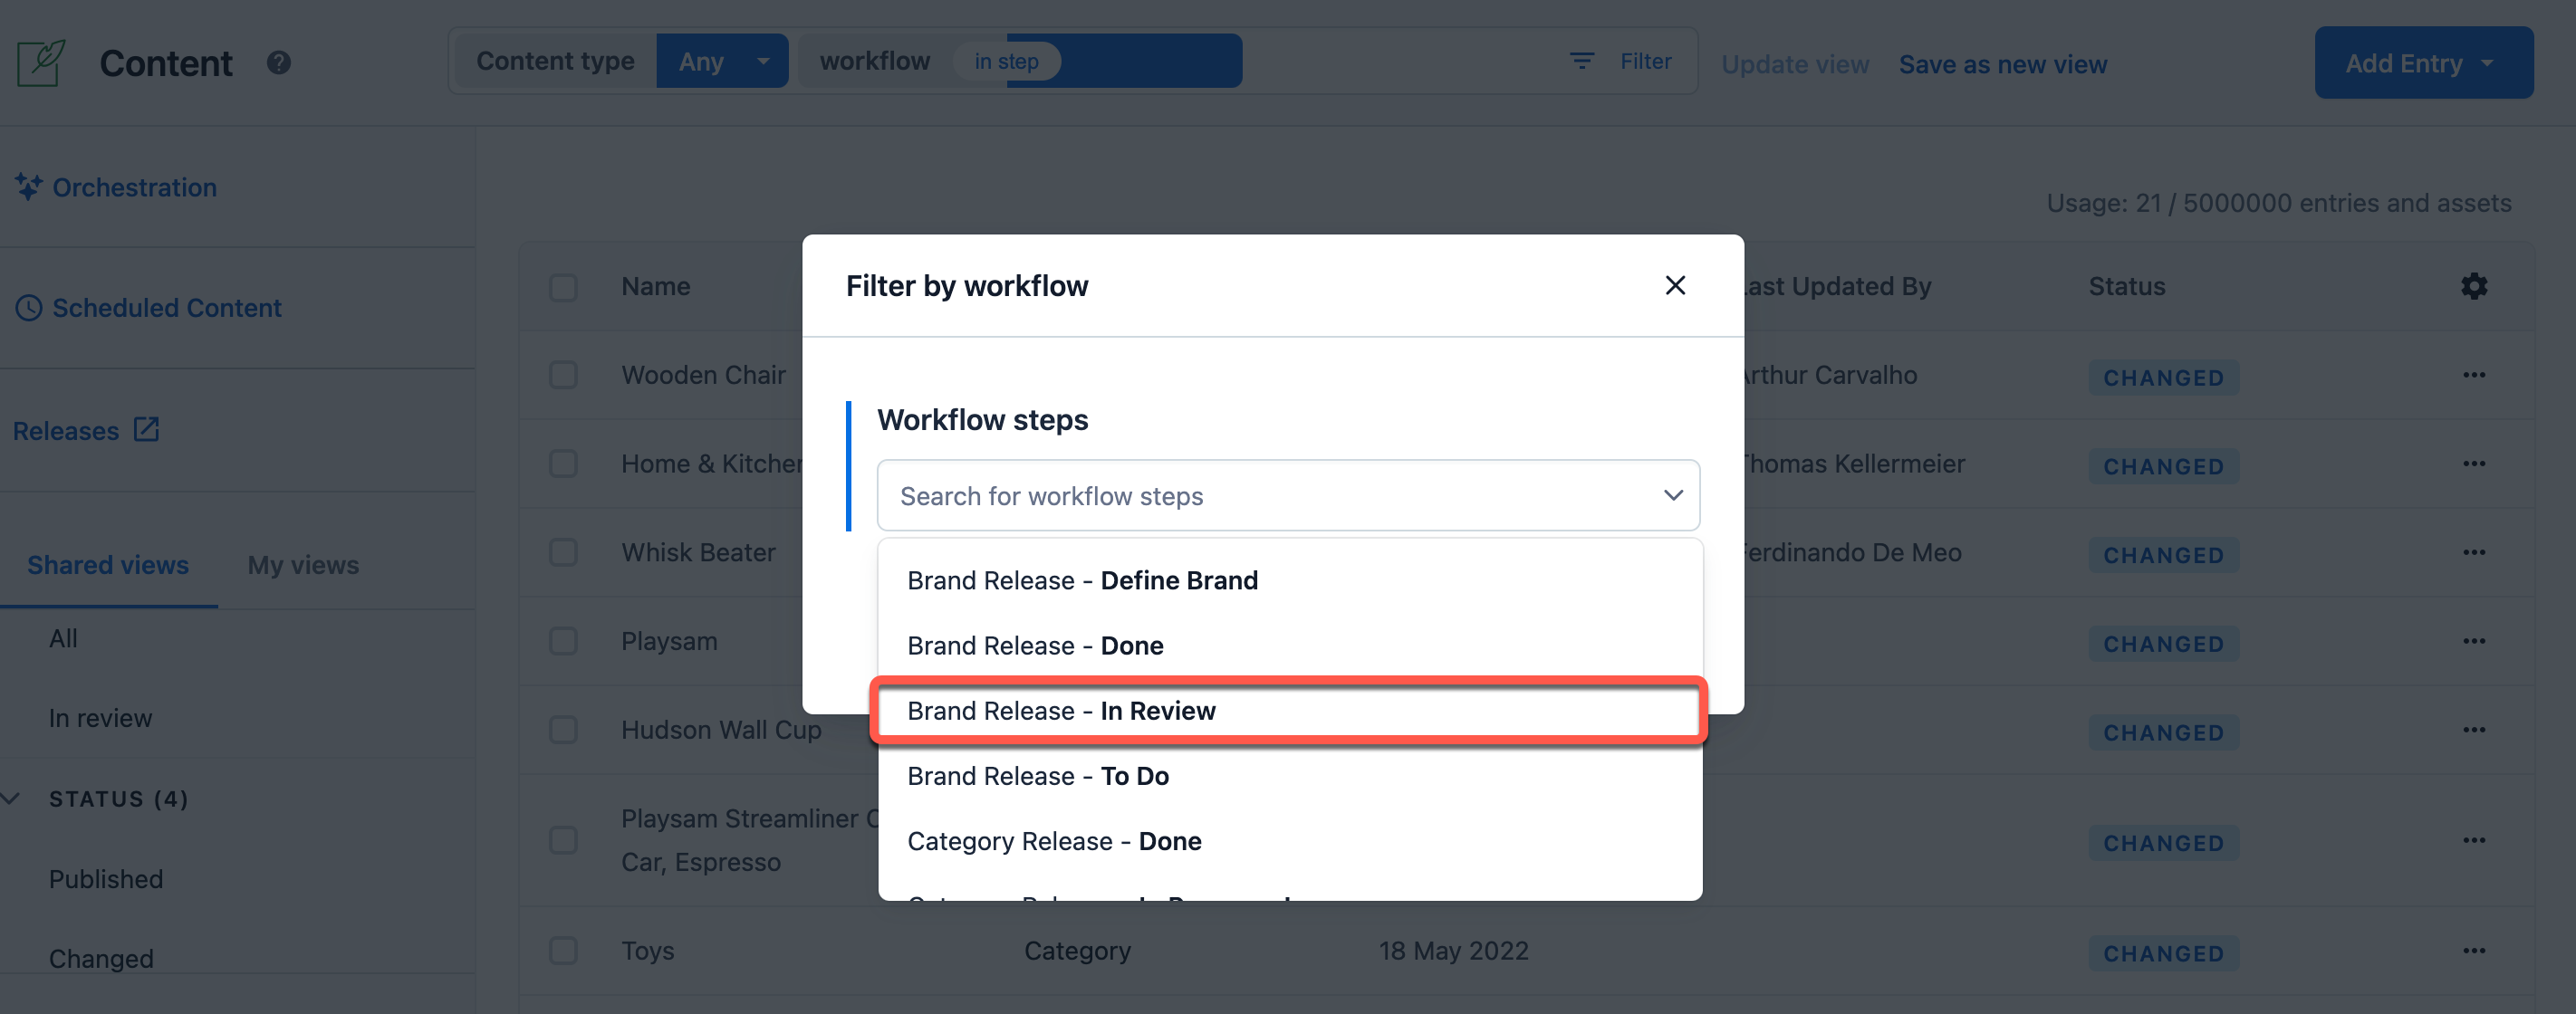
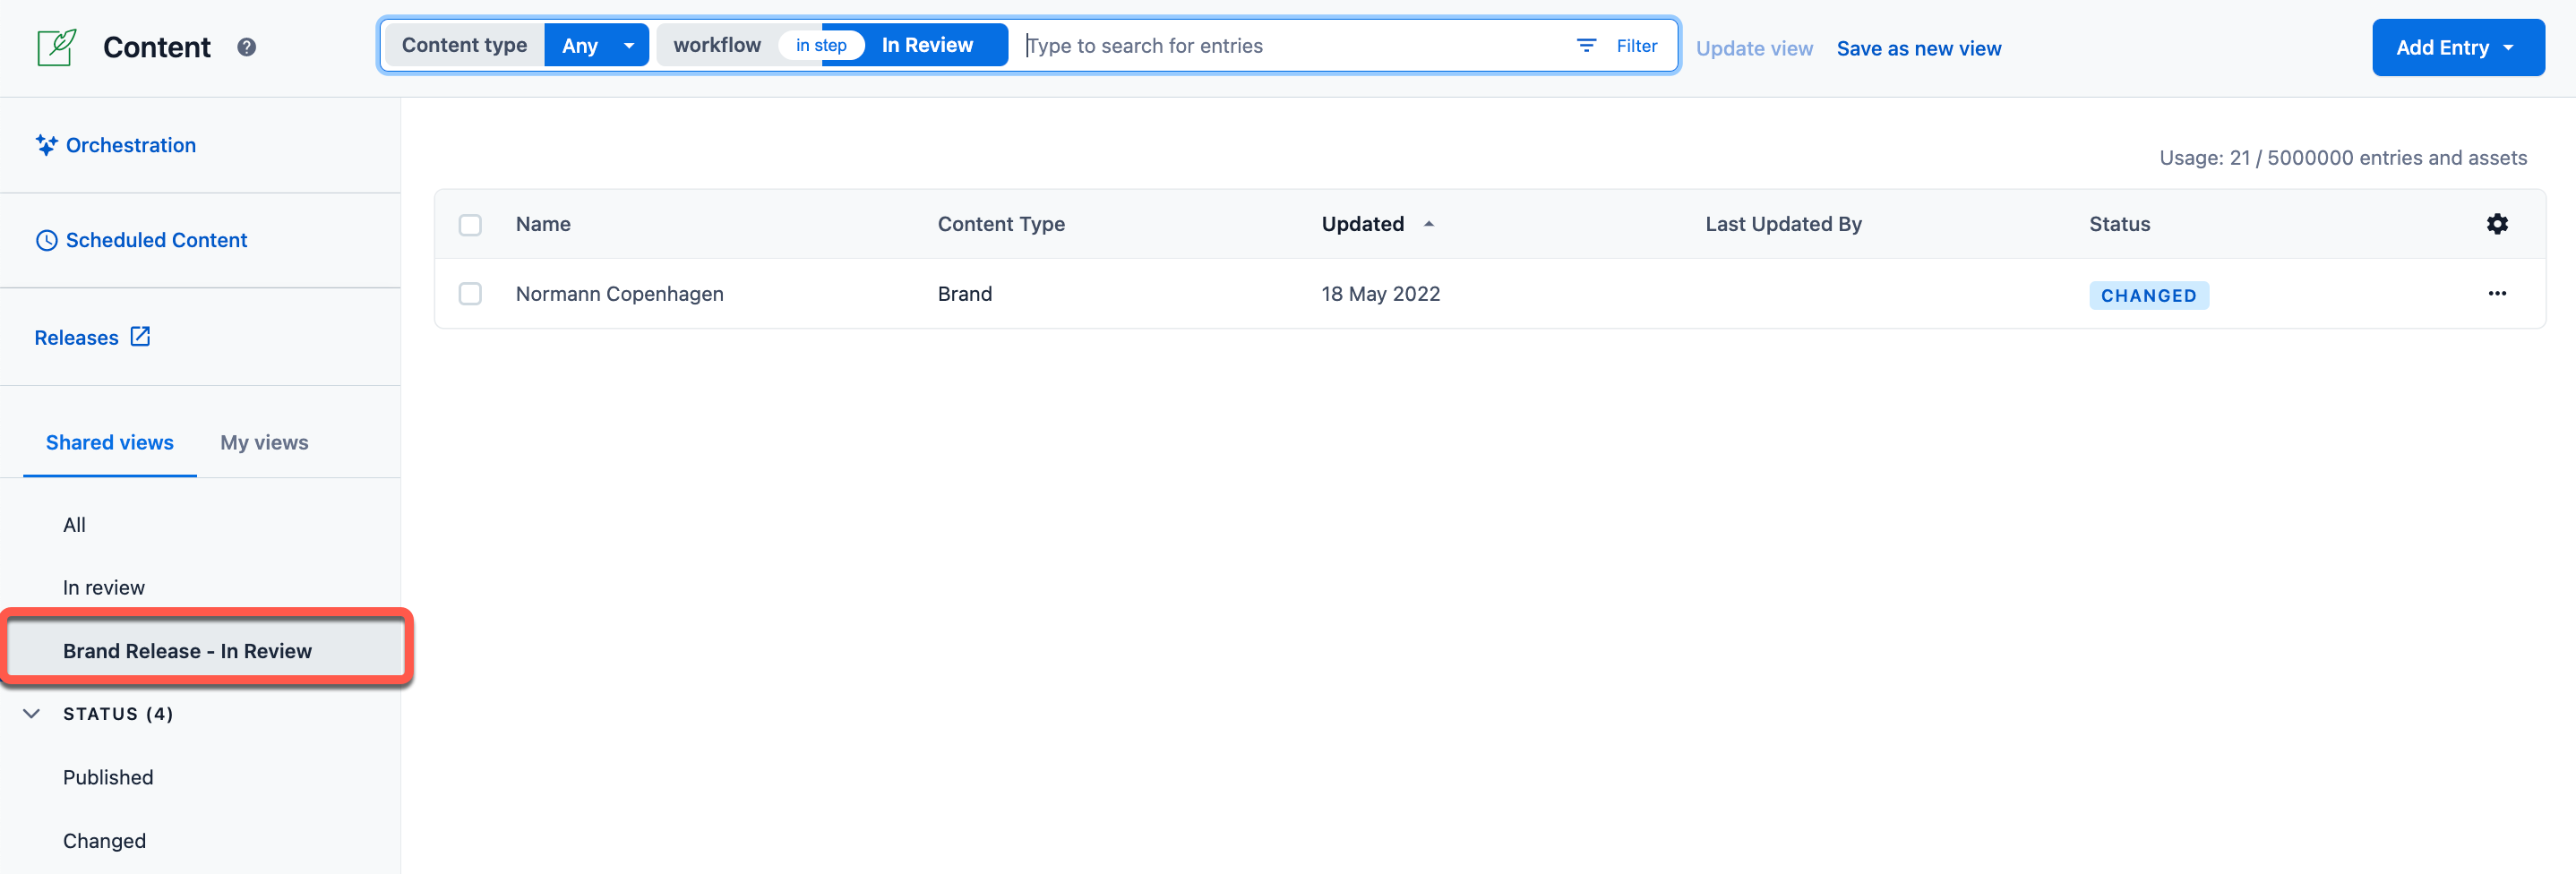
At the right of the search bar, click Save as new view. This will save the results currently displayed in your table as a new view on the left-hand sidebar.
In the “Save as view” pop-up, enter a name for this new view. Select if this new view should be displayed in the “Shared views” or “My views” section of the sidebar, click Save view.
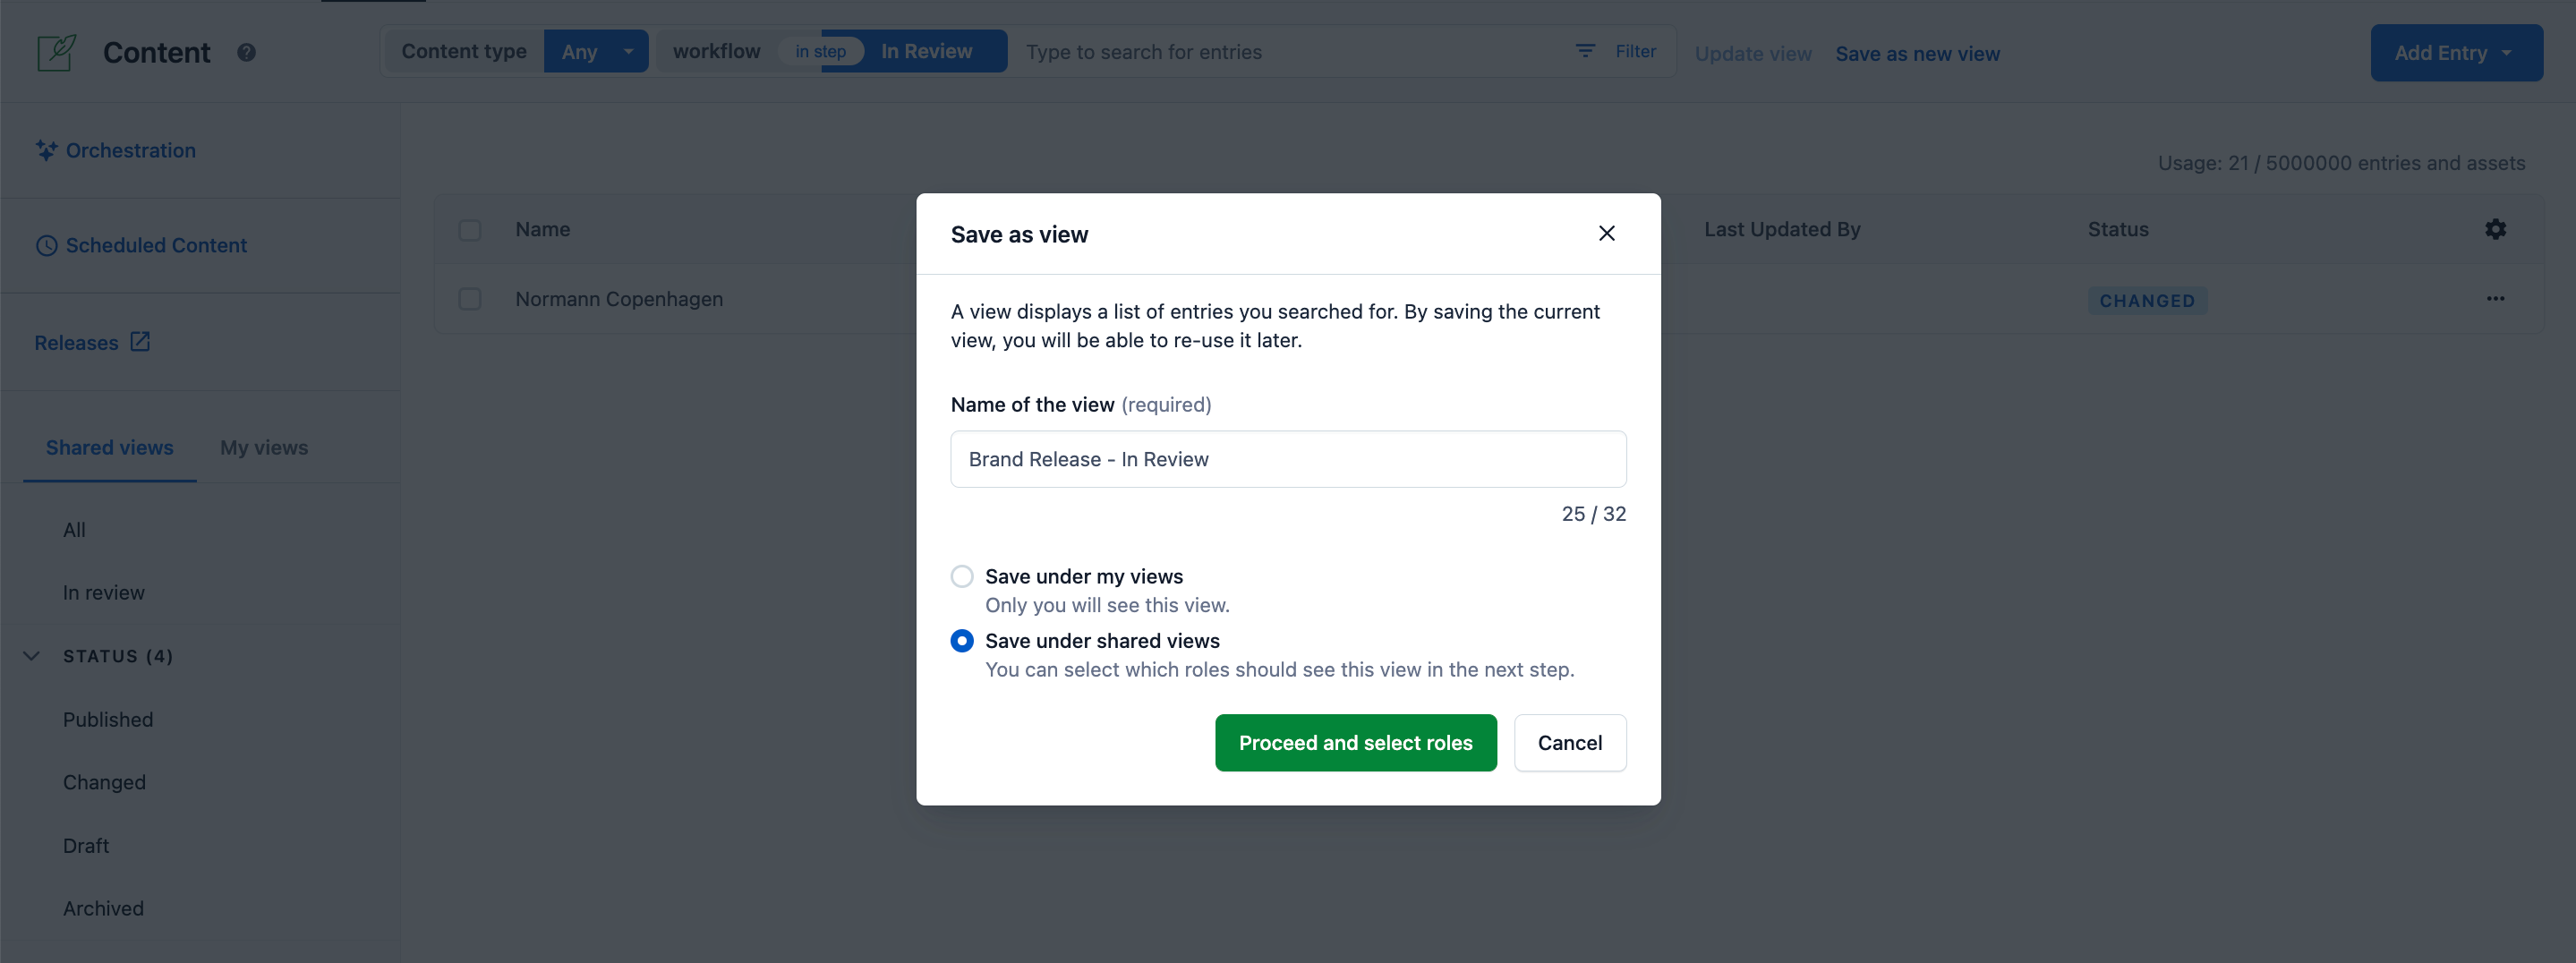
Choose which roles can display access to this new view and click Update and share this view. You will see the new view displayed in your selected section on the left-hand sidebar.
